Group distribution
A group distribution is the method used to distribute one package to one or more computers according to a predefined schedule.
Prerequisites
To understand the group distribution item life cycle and approval process
To understand the Miradore infrastructure components
To understand the item page workspace
To understand the group distribution item lifetime
Preparations
Check the amount of data moved over the network during the installation (between the installation point and the target device). If the amount of data is high (per LAN), you should consider splitting the deployment into multiple group distributions (with different deployment schedules) in order to split the network traffic.
Check the package requirements from the package items page (for example the package might require a reboot after the installation). These may require more testing and end-user informing.
Main steps to create a group distribution
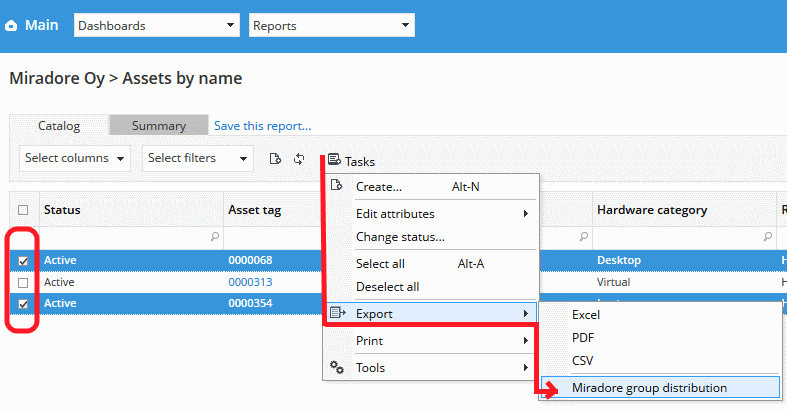
Navigate to any view which lists asset configurations items (e.g. Assets by name view) and use the checkbox in the leftmost column to choose the target devices where you want to deploy a package with this group distribution (You can modify the targets later if needed). When you have selected the target assets in the view, choose "Tasks > Export > Miradore group distribution".
Notice that only the following user groups have permission to create a Group distribution item: Administrators, Editors, Operators, Group distribution approvers and Web service writers
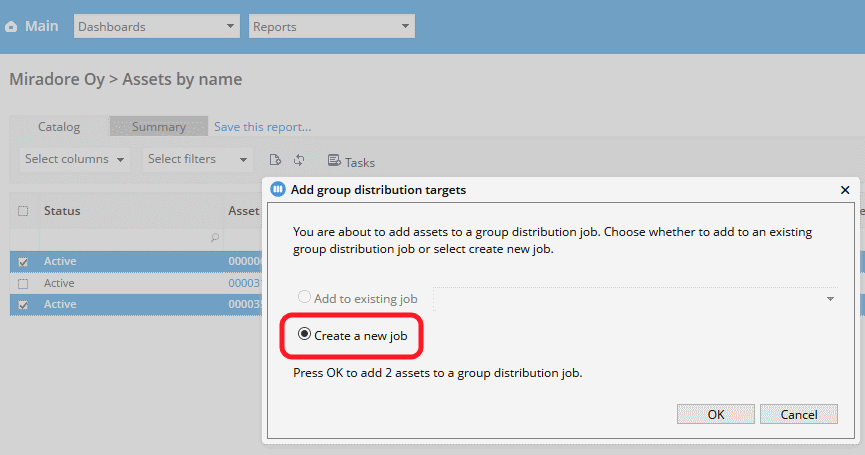
Choose "Create a new job" and press "OK".
Define settings for the package distribution. Notice that you can click the info icons from the table headers to see what the different settings mean.
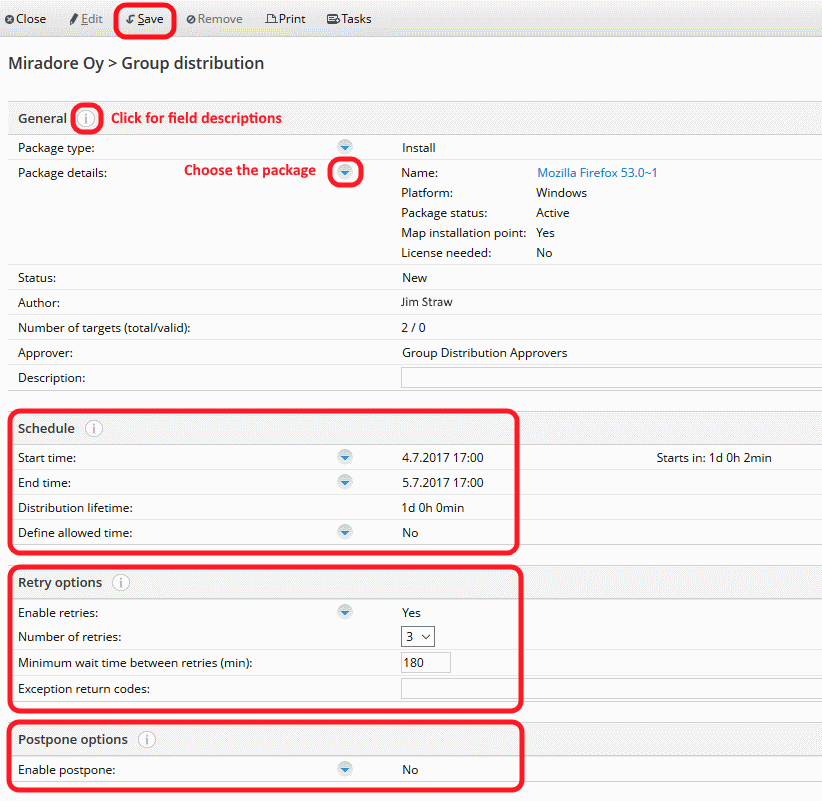
Pay attention especially to these fields:Package details
Start time, End time, Distribution lifetime
Enable retries, Number of retries
Enable postpone: You can give device users the option to defer the installation of software that are part of the group distribution.
Remember to save the settings by clicking "Save" from the toolbar.
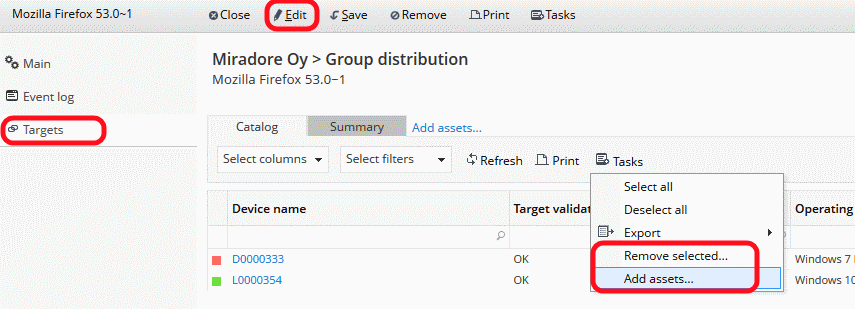
Check the group distribution targets from the "Targets" tab. You can add or remove targets through the Tasks menu when the page is in the "Edit" mode.
When you have confirmed the target devices, activate the group distribution through the Tasks menu. Administrators and editors with group distribution approver rights can activate group distributions by themselves, but editors without group distribution approver rights can only request activation.
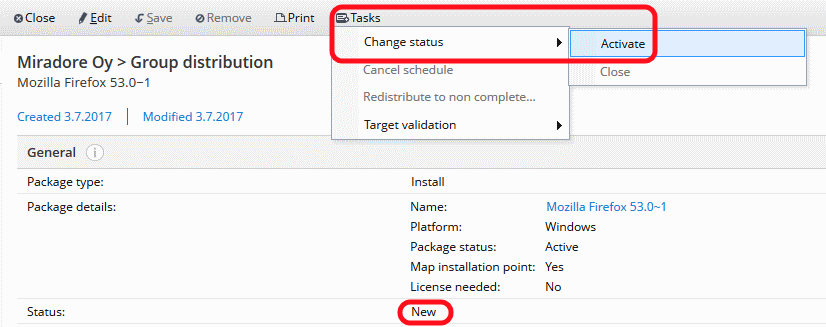
Administrators can enable/disable the group distribution item approval workflow in "System settings > Main > Approval process notifications". If the approval process is disabled, then editors cannot request activation of group distribution items at all.
The "Request activation" and "Activate" menu tasks remain inactive (gray) if no valid targets have been defined for the group distribution. You can add devices as targets to a group distribution using the "Export > Miradore group distribution" view task, which can be found in many views listing asset configuration items, for example in the Assets by name view.
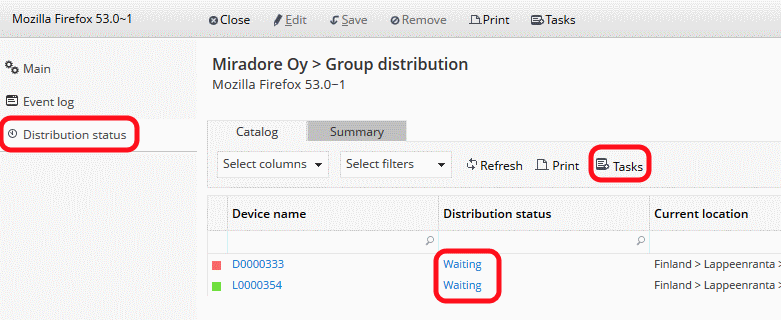
Follow-up the group distribution on the "Distribution status" tab of the Group distribution item page. If needed, you can cancel the group distribution through the Tasks menu when the page is in the "Edit" mode.
If needed you can redistribute package to all non-complete targets (Open group distribution item > choose Tasks > Redistribute to non complete). Or you can select targets from Distribution status tab and export them into new group distribution.
See also
Group distribution approval workflow
Group distribution item attributes
How to cancel a group distribution?
Postpone option for group distribution