Package building example: Microsoft Lync Basic 2013
This article provides a step-by-step tutorial for building an installation package, which installs Microsoft Lync Basic 2013 silently.
Step 1 of 4: Find out how to perform a silent installation
Start by downloading the installer for 32-bit Microsoft Lync Basic 2013 from: http://www.microsoft.com/en-us/download/details.aspx?id=35451
Name of the installer is "lyncentry.exe" and in this example it should be downloaded into "C:\test\" directory.
Investigate the installer for silent installation parameters
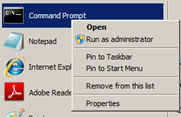
Run Command Prompt as an administrator on your computer. This is necessary because software installations require administrator permissions.
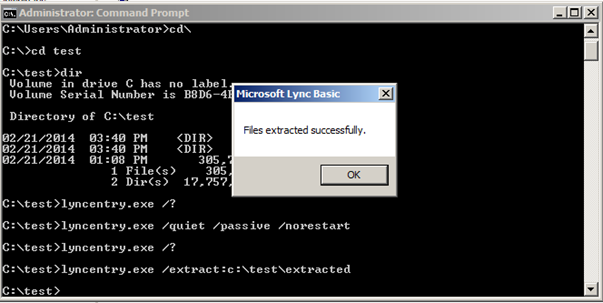
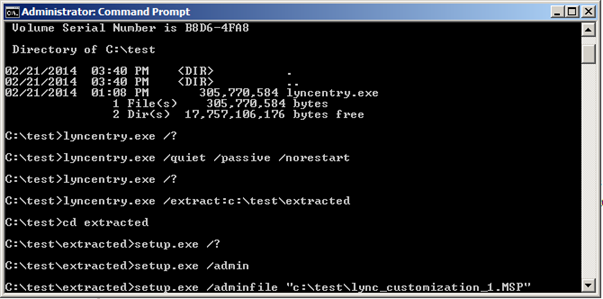
Navigate to "C:\test\" directory, and examine the installer parameters by entering the following command:
lyncentry.exe /?
As a result, you should see a popup window, which lists the available parameters and describes their use.
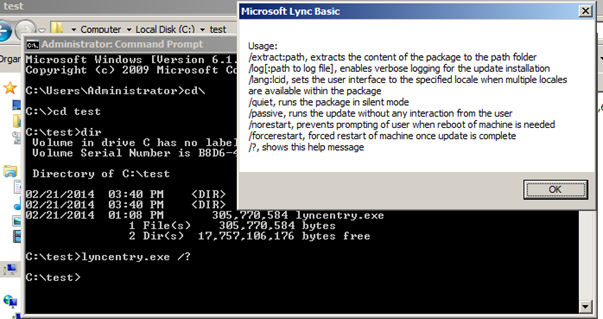
As we can see from the popup window, /quiet, /passive and /norestart look like useful parameters.
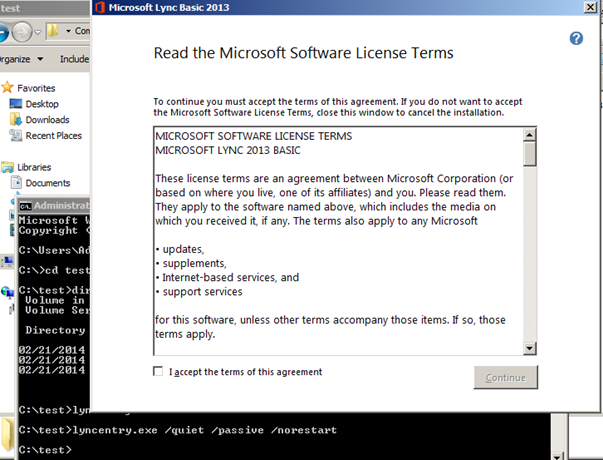
Test those parameters in Command Prompt by running the following command:
lyncentry.exe /quiet /passive /norestart
Soon you should see a window asking to accept EULA. This is not good, because our intention is to perform a totally silent installation without any user interaction.
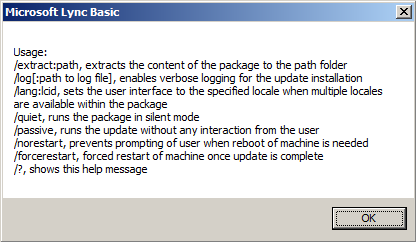
Therefore, we have to find a way to avoid this situation. Re-enter the following command in order to analyze the installer parameters again:
lyncentry.exe /?
You should again see the popup describing the installer parameters.
Try to extract the installer with the following command to learn more:
lyncentry.exe /extract:c:\test\extracted
As we can see, this command extracts the installer to the "c:\test\extracted" folder.
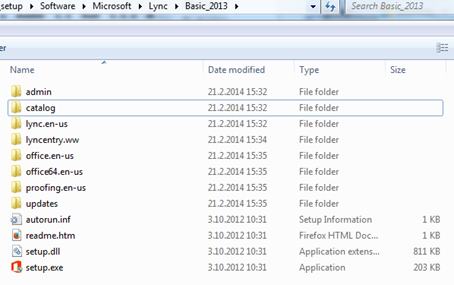
After the extraction, you should be able to see several files as shown in the following picture.
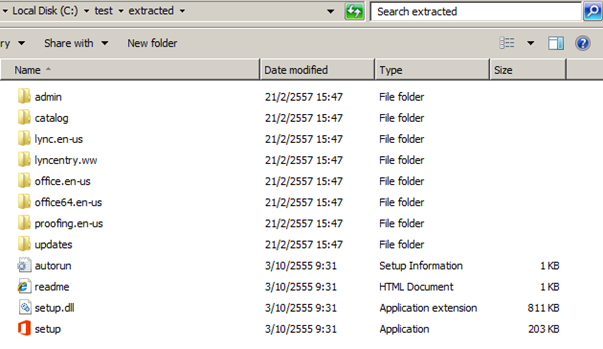
Notice that there is an application called "setup.exe". It may have parameters and command line help that could help us out. To find out more, navigate to the extracted folder, and run the following command:
setup.exe /?
After that, you should see a popup window showing the available parameters and their help.
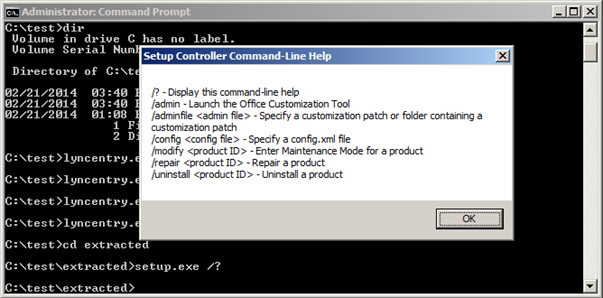
From here, we can see that we can launch the Office Customization Tool with /admin command, and then specify the customization patch with /adminfile. (Tip: All Microsoft Office 2013 products seem to have this same customization tool, which means that the same method can be used with Word, Excel, and so on.)
Next, run the customization tools with the following command:
setup.exe /admin
Soon, the customization tool should open up like in the picture below.
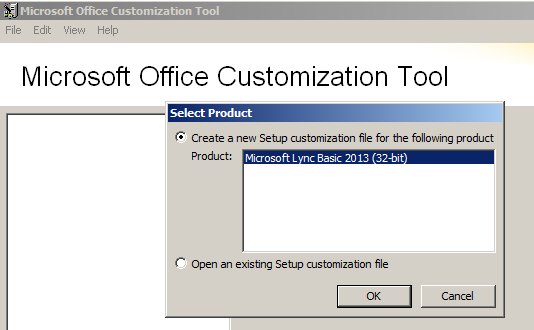
Click "OK" to customize Microsoft Lync Basic 2013.
In the customization tool, you are able to modify many different settings. However, the important settings regarding silent installation can be found under "Setup > Licensing and user interface". Go there.
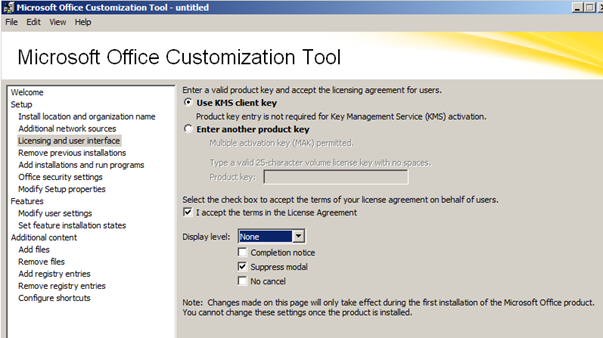
Tick the check box "I accept the terms in the License Agreement".
Select "Display level = None".
Tick the check box "Suppress modal".
And make sure that the check box "Completion notice" is unchecked.
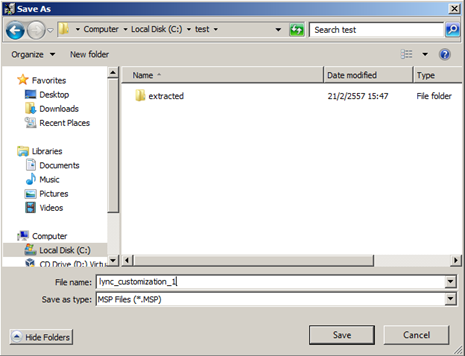
After the needed customizations have been made, save the customization patch by selecting "File > Save as...".
In this example, we will save the patch with file name "lync_customization_1.msp" to the "C:\test" folder.
Next, run the installer with the silent customization patch by enterinng the following command in Command Prompt:
setup.exe /adminfile "c:\test\lync_customization_1.msp"
You may monitor the installation by following the processes and disk activity from Windows Task manager.
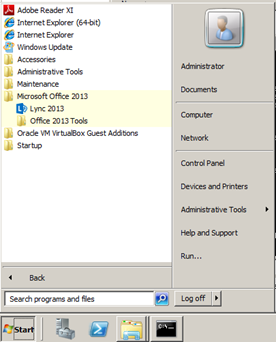
After a short while, you should have Lync 2013 silently installed!
Step 2 of 4: Create a managed software item to Miradore
Next, we need to create a managed software configuration item for Microsoft Lync Basic 2013 to Miradore Management Suite.
If the configuration item already exists in Miradore Management Suite, then do nothing, but if it hasn't been yet created, then create it from the "Operations > Software management > Managed software view" by using the view tools.
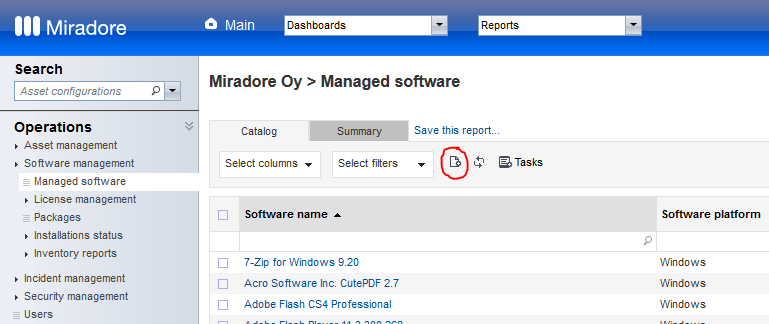
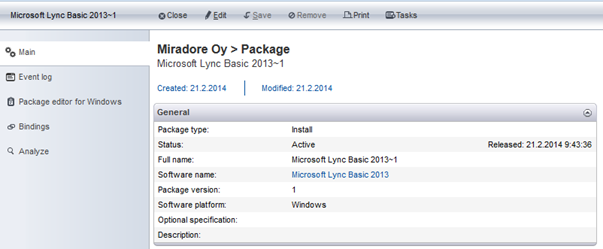
In the following image, you can see the desired outcome, a ready and active Managed software item. Pay attention to the contents of the first four fields.
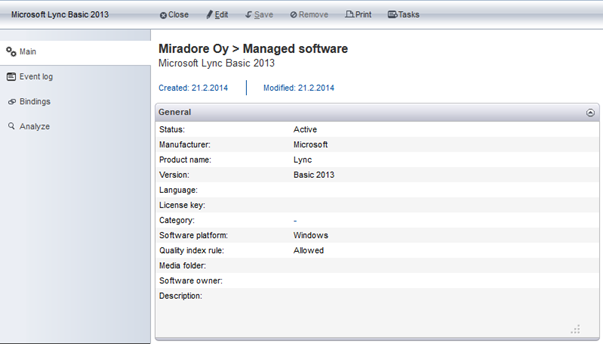
Lower at the same page, you will see "Package information" table. Make sure that the "Enable package building" field is set to "Yes" value.

Finally, make sure that you have activated the managed software item. The status field indicates the managed software item's current status. You may change the status through the "Tasks" menu. During the activation process, you may need to first request for approval and then approve the activation request.
Step 3 of 4: Create an installation package
Next, we will take a look how installation packages can be created in Miradore
Management Suite.
First, navigate to the "Operations > Software management > Packages view" in the left-side navigation menu of Miradore Management Suite, and use the view tools to create a new Package item.
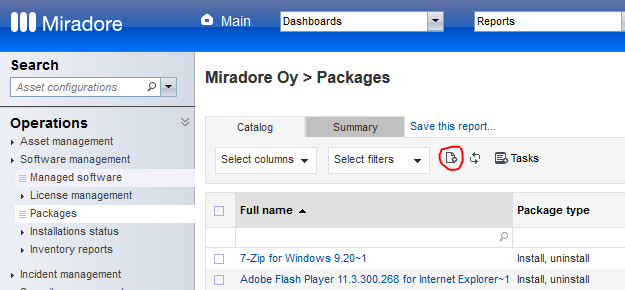
On the Package item page, fill in the mandatory fields, and then select Microsoft Lync Basic 2013 (managed software that you created earlier) into the "Software name" field.
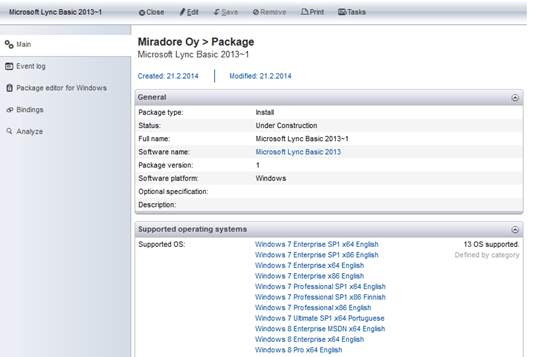
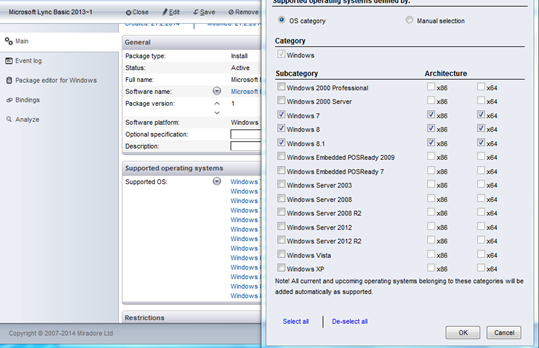
You may use the supported operating systems table to define the operating systems that are supported by the software installer.
Since we have the installation media (the one we extracted) and possibly customer-specific customization patch, it is recommended to define separate directories for these two. In the following picture, it is demonstrated how you can define different folders for the installation media and customization patch.

Pay attention to the use of %MDR_InstPoint% variable. When this package is being distributed, Miradore calculates the value for this variable dynamically. It will basically point to the root of the best/nearest installation point.
When you need to copy files to an installation point, you may use Windows remote desktop connection, file share etc.
By default, when Miradore server is installed, it will create an installation point to:
C:\Program Files (x86)\Miradore\Server\<instancename>\setup on the server.
This installation point should also be automatically shared with name: "setup$<instancename>" so you should be able to access it with UNC \\<server>\setup$<instancename>
Next, you should copy the customization patch to the package folder.

Notice: In the installation point, you should already have a "Packages" folders, but you will need to create the "Microsoft_Lync_Basic_2013" and "1" folders yourself.
Next, copy the extracted installer media to the media directory.
Notice: Just like with the package folder, you should have a "Software" folder there already, but you may need to create the missing folders by yourself.Finally, navigate back to the Package item page in the user interface of Miradore Management Suite. On the Package item page of "Microsoft Lync Basic 2013", go to the "Package editor for Windows" tab, and define one execution action.
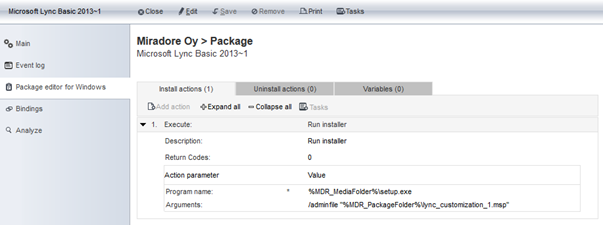
Add "Execute" action and define the "Description", "Program name" and "Arguments".
Program name: %MDR_MediaFolder%\setup.exe
Arguments: /adminfile "%MDR_PackageFolder%\lync_customization_1.msp"
Notice the use of %MDR_MediaFolder% and %MDR_PackageFolder% variables. These are two folders that we defined on the "Main" tab of this package item page.
Step 4 of 4: Testing and activating the package
At this phase, it would be useful if you had a dedicated test computer for testing the newly created installation package. Virtual computers are good for testing purposes, because they can be easily restored to the "pre-package installation" state after the test installation.
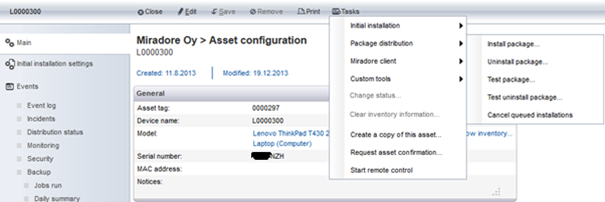
Go to the user interface of Miradore Management Suite, and navigate to the Assets by name view. Open up the test computer's Asset configuration page.
On the Asset configuration item page, use the Tasks menu (from the toolbar) to test the distribution of the package to the test computer. To do this, select "Tasks > Package distribution > Test package", and then select "Microsoft Lync Basic 2013~1" package.
You may follow the installation from the "Distribution status" tab of the Asset configuration item.

If the distribution status won't change to "Completed" in reasonable time, then you will have to do some troubleshooting.
Check that all the files are copied to the correct folders at the installation points.
Check all file and folder names for typos, because they need to be spelled exactly right.
On the package item page, change the "Interacts with desktop" to Yes, and re-try the package distribution. This will allow the installer to show error messages on the computer desktop if any problems would occur.
Notice that you should test the package distribution on several computers having different operating systems and installed applications.
Finally, if you are sure that the package works as expected, remember to change the package status to "Active". You may do this through the Package item page's Tasks menu.
Related to
See also