Implementing a service timer or SLA clock
About
Miradore administrators can implement a service timer or an SLA clock for the provided IT services in Miradore Management Suite. This can be done by using the Custom attributes and Automation Engine. The purpose of this is to help in creating scheduled and semi-automatic service workflows.
How it works
The idea is to use Automation tasks with the "Set timestamp" action to automatically manage the value of a custom attribute that has been added for asset configuration items. The attribute value, which is a timestamp consisting of date and time, is then used to trigger the next stage in the service process.
Example: Detecting orphan devices left behind by former employees
This example describes how to configure Miradore Management Suite to send an automated email to specified people whenever any device's responsible person has been 14 or more days in "Retired" status. The benefit of this use case is to detect unused devices whose responsible person has left the company.
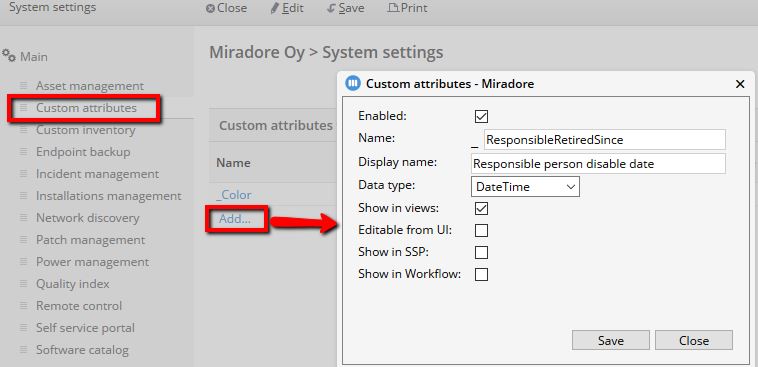
Add a custom attribute, for storing the device responsible person's disable date, for asset configuration items.
Navigate to "Administration > System settings > Main > Custom attributes" and add a new custom attribute using the Add... link in the edit mode. Select DateTime as the data type and enable Show in views. It is also recommended to disable the possibility to edit the attribute through the user interface.
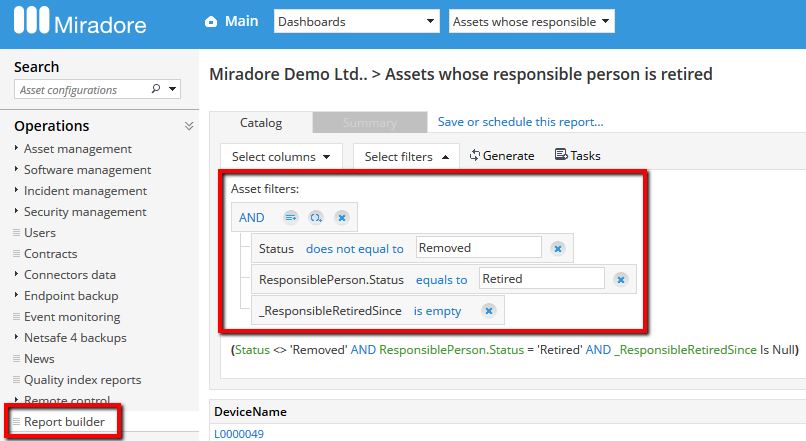
Create a report builder report which lists non-removed devices whose responsible person's status is "Retired" and where the value of the custom attribute is empty.
Navigate to "Operations > Report Builder view"
and create a new report which lists Asset
items. Pay special attention to the Asset
filter which defines what asset configuration items are included
in the report. In this case we choose to include the devices whose Status is not "Removed", whose responsible
person's status equals to "Retired" and where the value
of the _ResponsibleRetiredSince is empty.
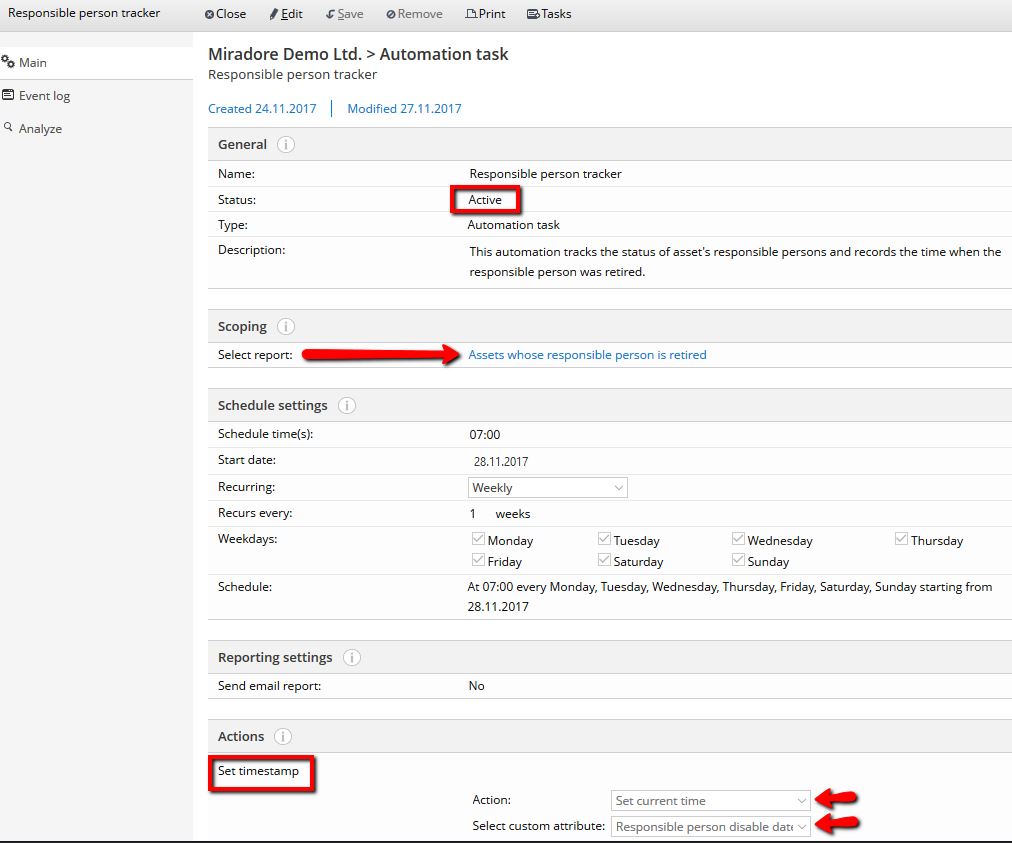
Create an Automation task and configure it to set the current date as the value of the custom attribute for all assets which are included in the report. In this case, the "Set timestamp" action sets the date only when the attribute is empty, which means that the attribute tells the date when the device appeared in the report for the first time.
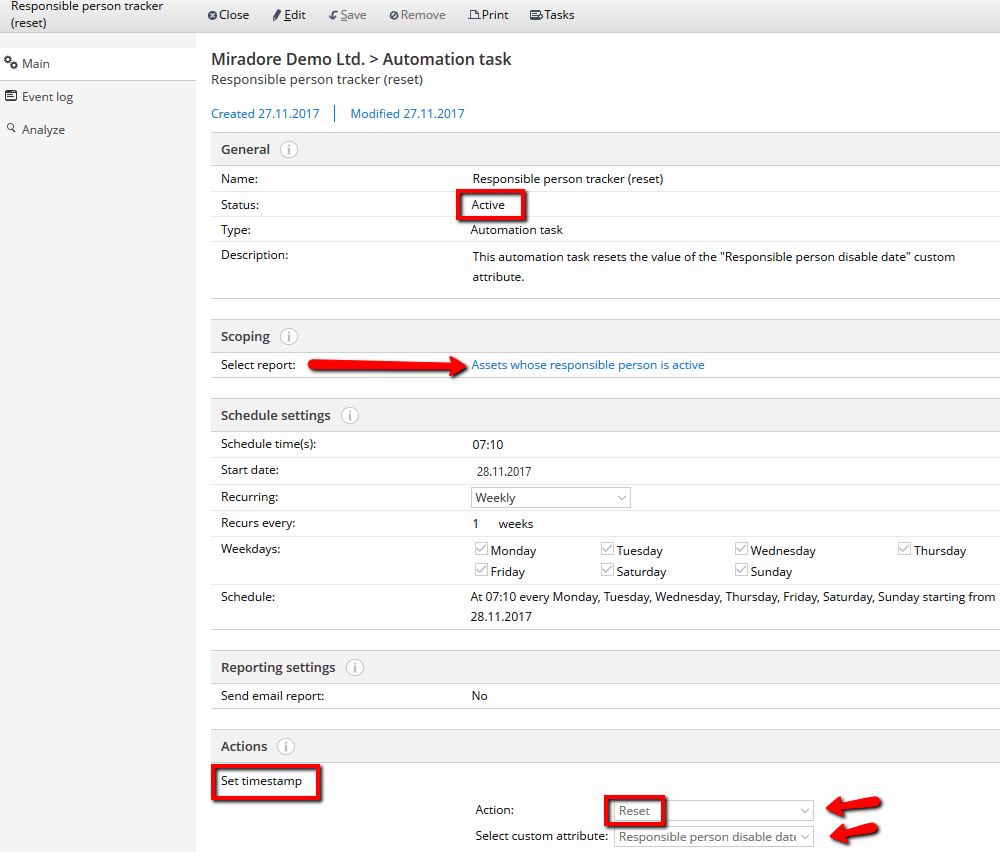
Navigate to "Administration > Automation tasks view" and create new Automation task item as depicted in the picture below. Select the report that you created in the previous step, define a schedule, configure the set timestamp action, and lastly activate the automation task.
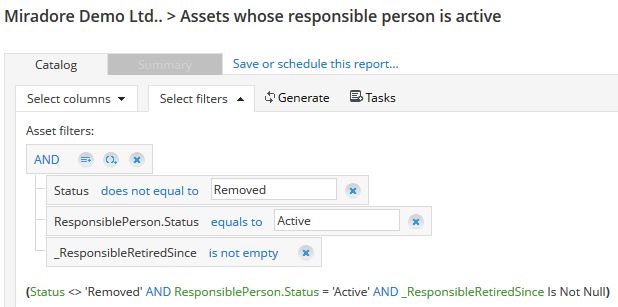
Then create another Report builder report which contains non-removed assets whose responsible person is active. This report is needed for detecting assets whose responsible person have become active again. Usually this means that the device has already been assigned to a new user.
Create also another Automation task and configure it to reset the custom attribute's timestamp for all devices that are listed in this latter report about devices with active responsible person.
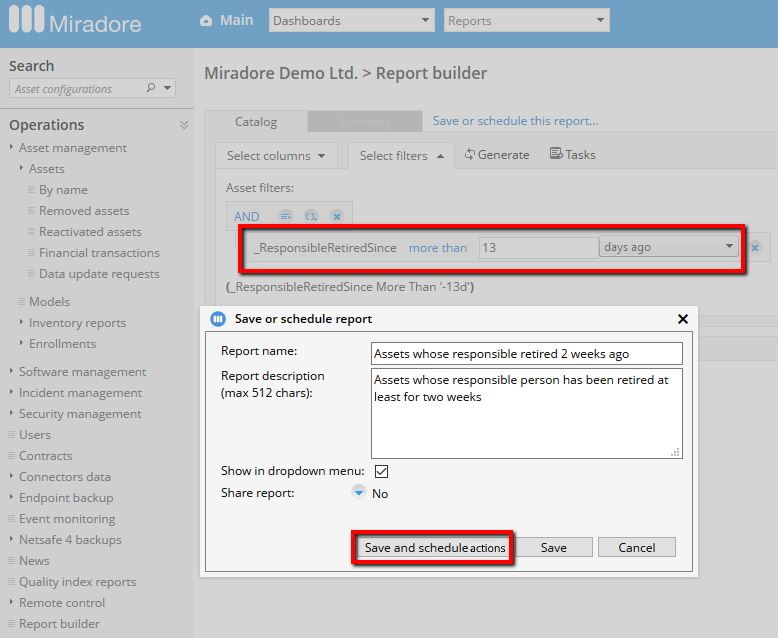
Create a third Report builder report which contains the devices where the custom attribute's value is at least 14 days old. Save the report using the Save and schedule actions option.
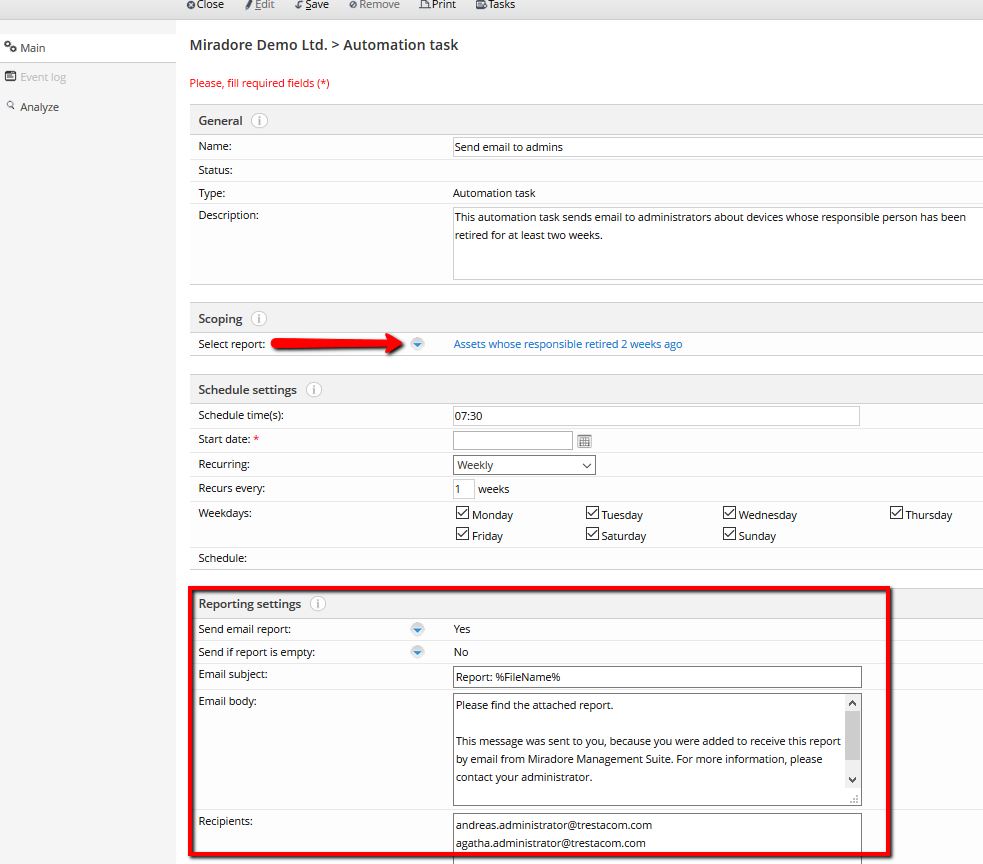
Configure the Automation task to send the report by email and specify the recipients. Enter one email address per line. Remember to save and activate the automation task.
When you have completed all the described steps, you're all set. The
specified recipients will receive emails when there are devices whose
responsible person has been retired for at least 14 days. You can also
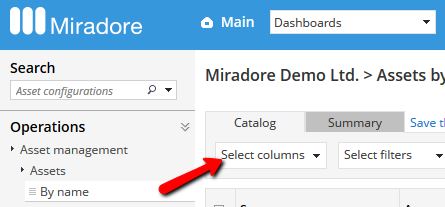
monitor the custom attributes value in Assets
by name view by adding the custom attribute as a column to the view.
Related to