How to install Miradore 5.8.0
Prerequisites
-
Microsoft IIS (Internet Information Server)
-
.NET Framework 4.7.2
-
Microsoft XML parser 6.0
-
Windows Installer 4.5
-
Report Viewer 2012
-
SQL Native Client 2012
-
Microsoft SQL Server 2008, 2008 R2, 2012, 2014, 2016, 2017 or 2019 (by default, the installer will install a 64-bit version of SQL Server 2017 Express)
Miradore installer will install any prerequisites that are missing from the computer where Miradore server is installed to.
Miradore installer can be used both to install new Miradore server and to upgrade existing servers. For upgrading an existing server, see also Upgrade notes.
Miradore installer can also be used for adding Patch manager component to a previously installed Miradore instance. If you're adding patch manager, choose upgrade installation and change the installation options.
Requirements for Miradore network traffic
|
Traffic Direction |
Task |
Destination port |
Description |
|
Client > Miradore server |
Job query |
Depends on used connection method: HTTP(s): 80/443 (configurable) |
Client job query |
|
Client > Miradore server |
Inventory (HTTP(S)) |
80/443 (configurable) |
Client inventory data |
|
Client > Installation point |
Get files |
Windows: SMB (TCP 445) Mac/Linux: HTTP(s) (TCP 80/443) |
Get files and installation media that are needed in package installations. |
|
Miradore client deployer > Miradore server |
Job query |
HTTP(s): 80/443 (configurable) |
|
|
Miradore client deployer > Miradore clients |
Client deployment |
TCP 135, 139, 445 |
Miradore client deployment. |
|
Miradore server > Client |
Client wake up |
32227 (configurable) |
Asks client to check for jobs. Send package actions to the client when distributing installation packages. |
|
Miradore server > SQL server |
Database access |
TCP 1433 |
Default port for SQL server. This port only needs to be opened if the SQL server is located on a different server than Miradore instance. |
|
Miradore server > SQL server |
Database access |
UDP Port 1434 |
The SQL Server Browser service listens for incoming connections to a named instance and provides the client the TCP port number that corresponds to that named instance. Normally the SQL Server Browser service is started whenever named instances of the Database Engine are used. The SQL Server Browser service does not have to be started if the client is configured to connect to the specific port of the named instance. This port only needs to be opened if the SQL server is located on a different server than Miradore instance. |
|
Installation point > Miradore server |
Report status |
HTTPS (TCP 443) |
Report installation point status to Miradore server. |
|
Microsoft Active Directory connector > Miradore server |
Get settings / Data import |
HTTP 80 / HTTPS 443 |
Communication between the connector and Miradore server. |
|
Microsoft Active Directory connector > Domain controller |
Read data |
LDAP (TCP 389) |
Connector uses Active Directory Service Interfaces (ADSI) to read data from domain controller. |
Main steps for installing Miradore Management Suite 5.8.0
Install Miradore Management Suite 5.8.0
-
Copy the Miradore installer (Miradore580.exe or Miradore580_Full.exe) to the computer. The installer can be downloaded from Miradore Support and Downloads portal.
-
Normal version of the Miradore installer (Miradore580.exe) will try to download any missing prerequisites from the Internet.
-
Full version of the Miradore installer (Miradore580_Full.exe) includes all the prerequisites needed to install Miradore server. Internet connection is not required during the installation.
-
-
Close all programs running on your system.
-
Run the installer (Miradore580.exe or Miradore580_Full.exe).
-
An installation wizard appears.
-
Follow the installation instructions on the screen to complete the installation.
-
 Welcome screen during the first installation of Miradore server on the computer.
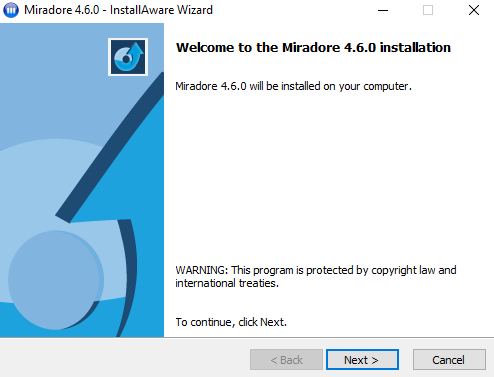
-
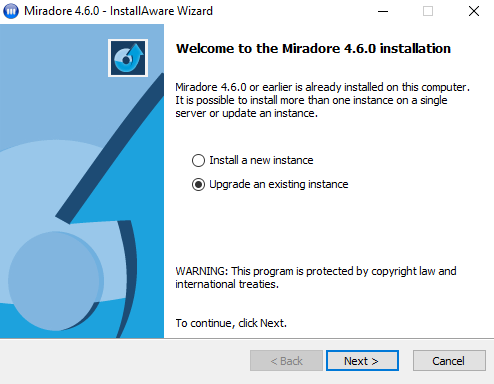
If a previous version of Miradore has been installed on the computer, the installer presents options to either upgrade a previous version or install a new instance of Miradore server.
-
-
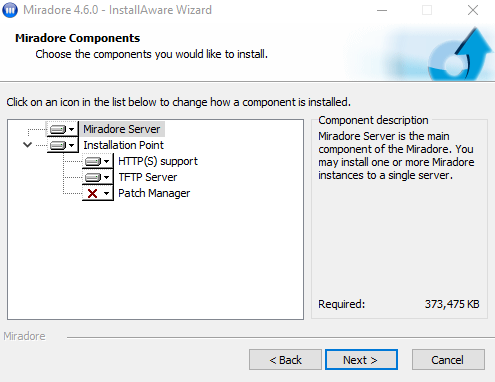
Select components to be installed.
-
Miradore server is the main component of the Miradore. You may install one or more Miradore instances to a single server.
-
Miradore Client is needed if you want to manage the server itself with Miradore.
-
Installation point is a regular file share consisting of required Miradore scripts and files, OS media and drivers, software media, security patches, and packages.
-
HTTP support for installation points is required by mobile devices and Linux computers.
-
TFTP server is needed when using network boot for initial installations.
-
Patch manager is required for security patch management. For more information, see Getting started with patch management.
-
-
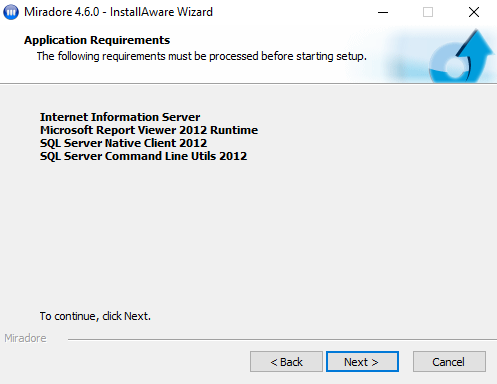
If some of the required components are missing, the installer will next install them.
-
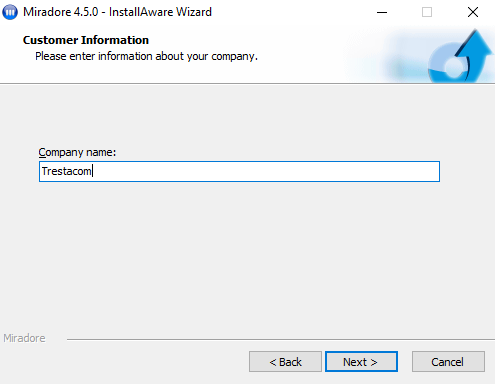
Enter company name. The company name will be displayed in the login screen of Miradore and also in the top of Miradore user interface. In initial installation, Company name is used as Full name and Organization for installed Windows computers. The company name can be changed later if necessary.
-
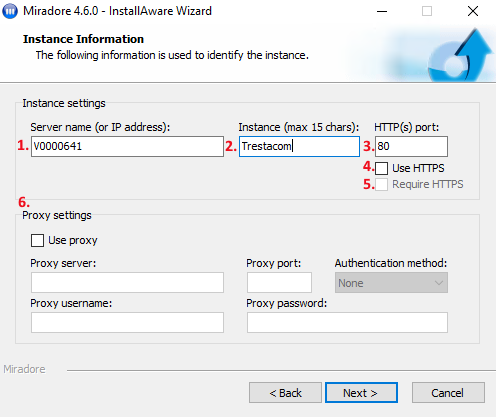
Enter instance information.
-
Server name (or IP address): Host name (preferably fully qualified domain name) or IP address of the server where Miradore will be installed to. Miradore clients use this name (or address) by default when connecting to the Miradore server.
-
Instance: Name for this instance of Miradore server. Instance name will be used to form the URL address to the Miradore instance, i.e.
http[s]://hostname[:port]/instance/ -
HTTP(S) port: HTTP(S) port that Miradore server is listening to.
-
When Use HTTPS is not enabled, the port setting will configure the HTTP port.
-
When Use HTTPS is enabled, the port setting will configure the HTTPS port. If Require HTTPS is not enabled, the default port 80 is used for HTTP connections.
-
-
Use HTTPS: Select Use HTTPS if secure connections to Miradore server are allowed. When Use HTTPS is enabled, Miradore clients will use HTTPS for server connections by default.
-
Require HTTPS: Select Require HTTPS if secure connections to Miradore server are required. When Require HTTPS is enabled, unsecured HTTP connections are not allowed.
-
Proxy settings. Define proxy settings if Miradore clients are required to access Miradore server through a proxy server. The proxy settings can also be configured later.
-
-
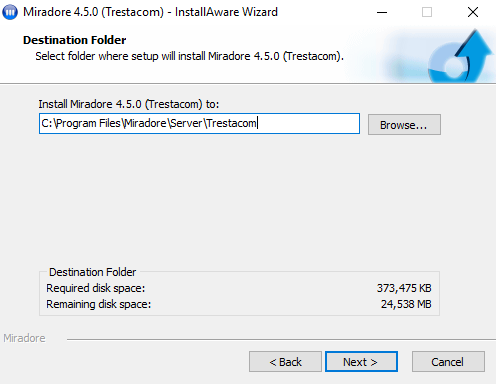
Select destination folder for installation (default folder recommended: C:\Program Files (x86)\Miradore\Server\<Instance name>).
-
Configure SQL server connection.
There are three options to configure the SQL server connection:
-
No existing database connection, use the Microsoft SQL Server Express that will be installed by the installer (default option). Note that the installer will ask if it should install Microsoft SQL Server Express, if an SQL server is not installed on the computer.
-
Default settings for Microsoft SQL Server Express
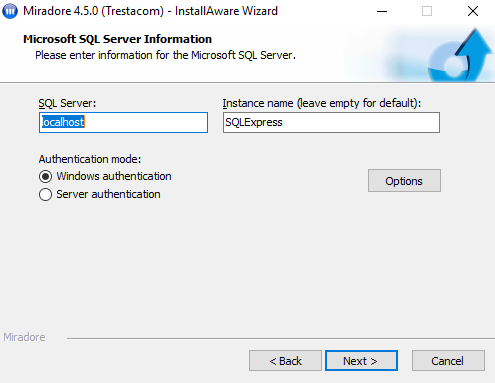
Default settings for Microsoft SQL Server Express
-
SQL Server: (local)
-
Instance name: SQLExpress
-
Authentication mode: Windows authentication
-
-
-
No existing database connection, install an SQL server manually.
-
Settings for manually installing SQL Server
If separate SQL server is used or you want to configure SQL instance for Miradore yourself, following configurations should be used.
-
Select mixed authentication mode, otherwise leave settings to defaults (case-insensitive collation required and is selected by default).
When installing Miradore for the first time to a computer, the account used to connect to the SQL server must must have sysadmin rights. By default, any subsequent upgrades will use an internal administrator account created by the installer.
-
-
-
Already existing database connection to an SQL server that is used with Miradore.
-
See Settings for manually installing SQL Server above.
-
-
-
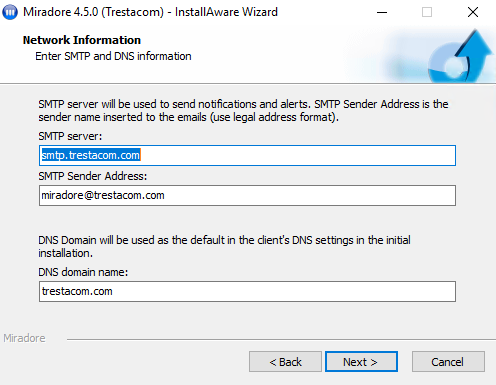
Configure Simple Mail Transfer Protocol (SMTP) and Domain Name System (DNS).
-
SMTP server can be used for sending notification and enrollment emails.
-
DNS domain name is used as the default domain for initial installations.
You can change the SMTP and DNS settings later in the system settings of Miradore, for example, if you want to configure SMTP encryption settings. -
-
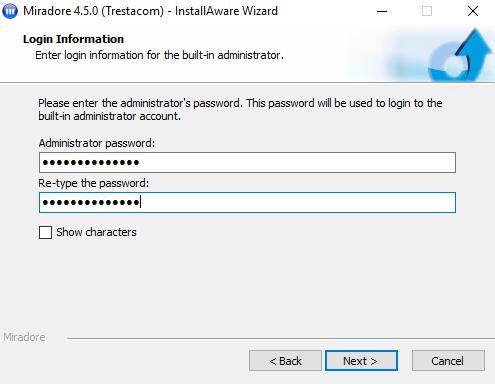
Enter the administrative password. This will be the password for the default administration account (Login name: Administrator). The account is included in the built-in administrators group and can be used to log in to Miradore for the first time.
-
Review information and start installation. The installer writes a log file to folder %windir%\temp\Miradore for problem solving purposes.
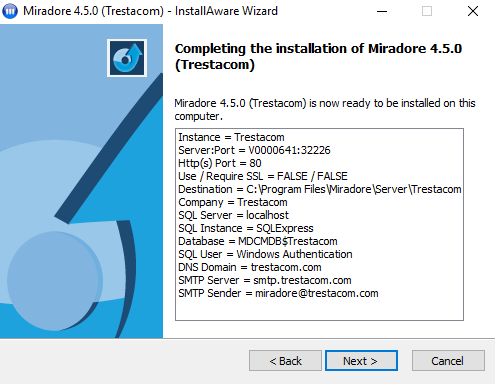
-
Wait for the installer to complete and click Finish.

-
-
Click Yes if you are prompted to restart your server.
-
You have successfully installed Miradore server!
Default administrator account
During the installation, the installer creates a default administrator account to Miradore and allows to configure default password for the account. The default account is used to login to Miradore for the first time.
Start Miradore management console
After installing Miradore server, its services are started automatically.
See How to access Miradore management console for instructions to start the console.
Initial configuration
The product is now ready for initial configuration.
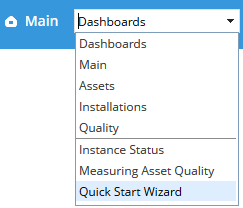
If you need instructions for configuring Miradore Management Suite, open the "Quick Start Wizard" from the Dashboards menu. It will guide you through the basic implementation steps.
Besides that, you can also utilize Miradore management console setup guide.
Users and permissions
In addition to the default administator account, the following user groups are also generated to Miradore automatically:
|
Group name |
Description |
|
Administrators |
Built-in administrators group members have access to everywhere in the system and they have full permissions to create and approve new items in Miradore. The administrators also define the permissions for the other roles. In addition, the administrators can also install Miradore client, start initial installation, and install packages to managed assets. |
|
Asset model approvers |
Built-in asset model approvers group members have permission to approve asset model items in Miradore. The asset model approver is an additional role to required roles. |
|
Editors |
Built-in editors group members have access to everywhere in the system except to the System settings. The editors have full permissions to create new items in Miradore, but they cannot approve any other items than license pools. |
|
External event writers |
Built-in event writers group members have permission to send events from external systems into Miradore using the mdevent.exe. The event writer is an additional role to required roles. |
|
Group distribution approvers |
Built-in group distribution approvers group members have permissions to create, approve, or reject group distributions in Miradore. The group distribution approver is an additional role to required roles. |
|
Helpdesk operators |
Built-in helpdesk operators group members have read access to everywhere in the system except System settings. The helpdesk operators have permissions to install Miradore client and packages to managed assets. Helpdesk operators' permissions can be limited or expanded using item permissions. |
|
License administrators |
Built-in license administrators group members have permissions to access license transaction prices, create license pool items, create managed software items, and activate or close license pools. The license administrator is an additional role to required roles. |
|
Managed software approvers |
Built-in managed software approvers group members have permission to approve managed software items in Miradore. The managed software approver is an additional role to required roles. |
|
Mobile device security officers |
Built-in mobile device security officers group members have permission to lock and wipe managed mobile devices. The mobile device security officer is an additional role to required roles. |
|
Network operators |
Built-in network operators group members have permission to create TCP/IP items into Miradore. The network operator is an additional role to required roles. Network operators' permissions can be limited or expanded using item permissions. |
|
Operators |
Built-in operators group members have read access to everywhere in the system except to Miradore system settings. Operators are able to create new asset configuration and asset model items, but they don't have permissions to approve new items. Only approved items may be used in Miradore. The operators do not have permissions to install Miradore client, start an initial installation or install packages to managed assets. Operators' permissions can be limited or expanded using item permissions. |
|
Package approvers |
Built-in package approvers group members have permissions to create and approve package items in Miradore. The package approver is an additional role to required roles. |
|
Package builders |
Built-in package builders group members have permissions to create managed software and package items. The package builder is an additional role to required roles. |
|
Readers |
Readers is a built-in Miradore user group. Members of the readers group only have a read access to every where in the system except system settings by default. Readers' permissions can be limited or expanded using item permissions. |
|
Security officers |
Built-in security officers group members have permission to view detailed reports of virus alerts in Miradore. The security officers are also allowed to perform patch management tasks in Miradore. The security officer is an additional role to required roles. |
|
Web service readers |
Web service readers is a built-in Miradore user group. Only members of Web service readers group are allowed to query data from Miradore using Miradore web service. |
See also