Endpoint backup end-user instructions
This page provides usage instructions to Endpoint backup end-users.
The available Endpoint backup features depend on Endpoint backup system settings located in Miradore, where Miradore administrators can configure which features of Endpoint backup are available for users. There it is also possible to configure the devices where the Endpoint backup is enabled.
 How to access Endpoint backup client on a managed device
Endpoint backup is supported on Windows, Linux, and OS X platforms and it also has a graphical user interface, Endpoint backup client, which can be accessed on the managed devices. Using the Endpoint backup client, device end-users can see the backup status of their local files, create new backups, and also restore deleted or corrupted files from backup storage.
How to access Endpoint backup client on a Windows device
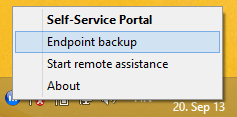
On Windows computers, the Endpoint backup client can be accessed by clicking on the Miradore tray icon and choosing "Endpoint backup" from the menu that is shown (Image 1).
![]()
![]() Image 1: Miradore tray
icon on Windows computers.
Image 1: Miradore tray
icon on Windows computers.
How to access Endpoint backup client on a Linux device
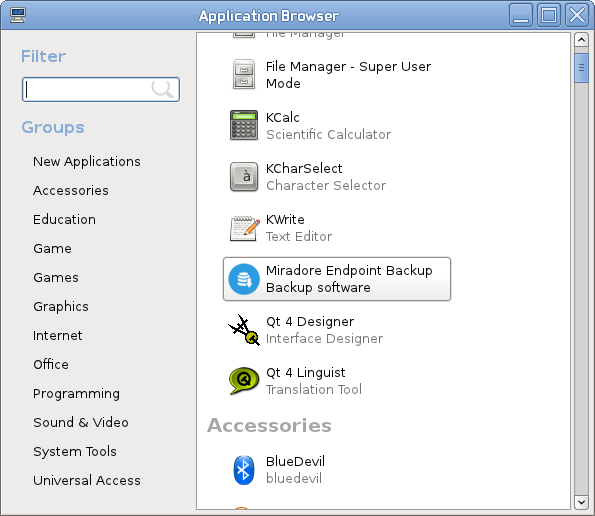
The location of the Endpoint backup icon may vary between different Linux distributions. Below is one example, how the Endpoint backup client can be launched in Linux.
![]()
![]() Image 2: In OpenSUSE
11.4 GNOME, the Endpoint backup client can be launched from "Computer
> More applications > Accessories".
Image 2: In OpenSUSE
11.4 GNOME, the Endpoint backup client can be launched from "Computer
> More applications > Accessories".
How to access Endpoint backup client on an OS X device
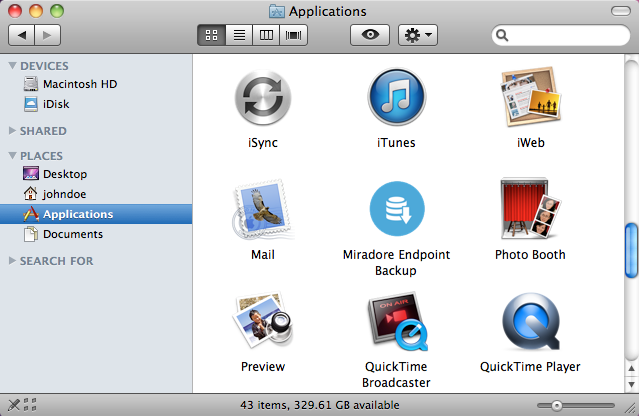
On OS X computers, the Endpoint backup client can be accessed by clicking on the Endpoint backup icon at Applications folder.
![]()
![]() Image 3: Endpoint backup
icon can be found from Applications menu on OS X computers.
Image 3: Endpoint backup
icon can be found from Applications menu on OS X computers.
Notices
If you cannot find the Endpoint backup icon, ensure that the Endpoint backup feature has been enabled for the computer and also make sure that the Miradore client meets the Endpoint backup system requirements.
How to create an Endpoint backup user account
Users of Miradore-managed computers are able to create Endpoint backup user accounts as a self service if Endpoint backup is enabled for the user's computer and if "Allow user registration = Yes" in the system settings of Miradore. Otherwise, the users are not able to create Endpoint backup user accounts by themselves.
How create an Endpoint backup user account
as a self-service
Open Endpoint backup client. See How to access Endpoint backup client on a managed device for more information.
- Click
"Create an account" link on the Endpoint backup
login screen.
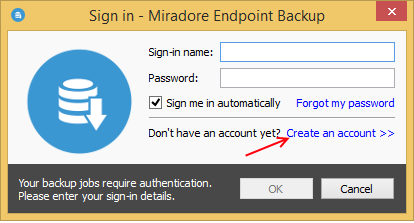
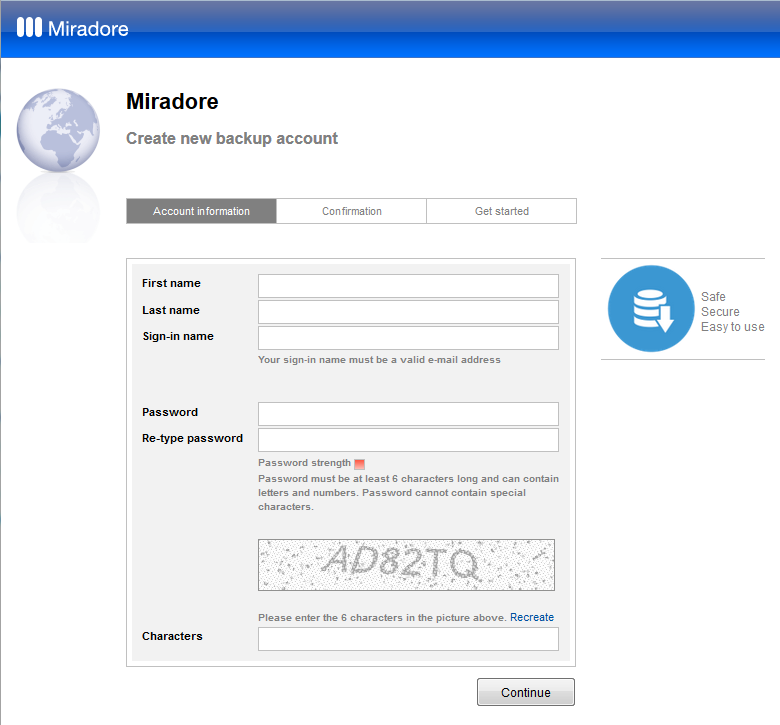
- You
will be directed to a website which guides you through the
account registration process. Follow the instructions given
on the web page and remember to activate the account by using
a link that is e-mailed to in the very end of the registration
process.
Notice
If you cannot open Endpoint backup client at your computer, your administrator may have disabled the feature from your device or your device might not meet the Endpoint backup system requirements.
If you cannot see the Create an account link in the login screen of the Endpoint backup client, your administrator may have disabled the self-registration of Endpoint backup user accounts.
How to create a new Endpoint backup job
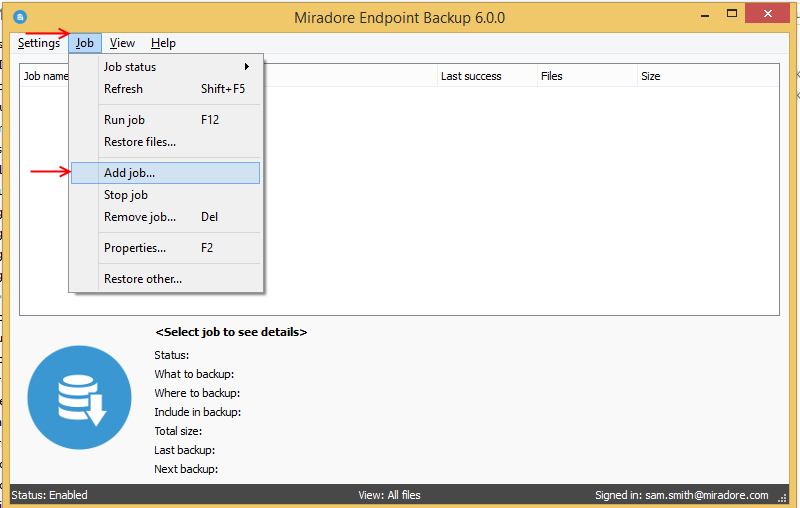
The following picture illustrates one method to create new backup jobs in Endpoint backup client. Another method to create new backup jobs would be to right-click and select "Add job..." on the content area of backup client window.
Endpoint backup job configurations
The following picture displays backup job configuration options, which are explained under the picture.
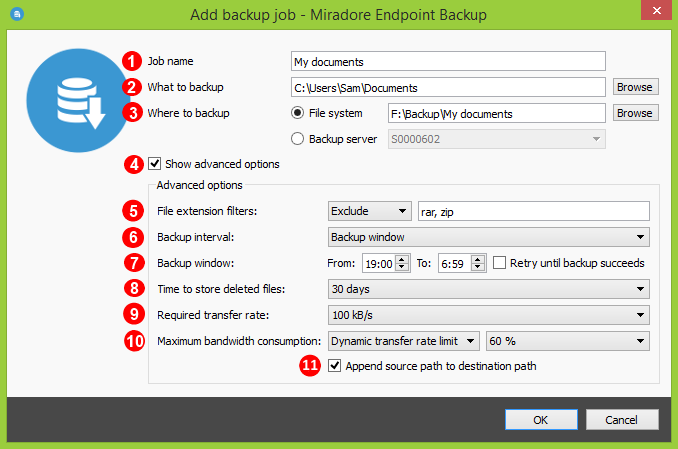
Job name field defines a name for the backup job. Main window of the backup client lists all active backup jobs by their name so it is recommended to enter a descriptive name for the backup job.
What to backup field defines the folder which is backed up by the backup job.
Where to backup field defines the location where the backup files are stored to. If Endpoint backup servers have been installed to the environment then it is possible to store backup files to them over HTTP(S) protocol. Otherwise, backup files can be stored to local drive or to a network destination. Backup servers menu only lists such Endpoint backup servers of which "Hide from users" setting is set to No in Miradore. In addition, Miradore administrators may have limited the use of some backup server to only some certain Microsoft Active Directory user groups. If the user is not authorized to use the backup server the backup job fails to run and the reason is explained in status bar of the Endpoint backup client.
Show advanced options checkbox shows or hides the advanced backup job configurations (5-11 in the picture).
File extension filters can be used to define which files (only) should be included into or excluded from the backup. For example, Include only: .exe, pdf would mean that only files with .exe or .pdf extension will be backed up from the directory defined in What to backup field.
Backup interval defines the default running interval of the backup job. In addition, it is possible to run the backup job from the main window of backup client.
Backup window defines a time slot when the backup job is most suitable to run. For example, 20-05 means that the backup job must run between 8:00 PM and 5:59 AM. The backup job runs at a random time within the given backup window.
- Retry until backup succeeds defines whether Miradore must try to run the backup job again if it didn't succeed to run the backup job with the previous attempt. This setting is applied to the backup jobs which are scheduled to run during a backup window. Notice that a retry may take place outside the backup window.
Time to store deleted files field defines how long the removed files are stored on the backup location defined in Where to backup after removal. Once the given time has elapsed, the files will be permanently erased from the backup location.
Required transfer rate field defines the minimum network speed which is allowed to start running the backup job. This field can be used to prevent making backups over really slow connections. If the backup job is initiated manually, the required transfer rate setting is disregarded.
Maximum bandwidth consumption defines the maximum allowed network bandwidth consumption for transferring backup files from a computer to a backup destination. The setting is not applied when backup files are recovered back to the computer from the backup destination.
The possible values of this field are:Not defined: If limit has not been defined, the backup client is allowed to use all the available network bandwidth to transfer the backup files to the backup destination.
Static limit: If static limit is selected, the selected value defines, in kilobytes or megabytes the maximum allowed bandwidth consumption for transferring the backup files to the backup destination.
Dynamic limit: If dynamic limit is selected, the selected value defines, in percentages the maximum allowed bandwidth consumption for transferring the backup files to the backup destination.
If the backup job is initiated manually, the maximum bandwidth consumption setting is disregarded.
Append source path to destination path defines if the backup source path is appended to the destination path when performing backup to a file system. This setting is available only for file system backup jobs.
Disabling this setting may avoid the situation where the maximum path length of the Windows file system gets exceeded. Note that when this setting is disabled, extra precaution is required for not to create multiple backup jobs that point to the same destination folder.
Example:
Backup source folder is "c:\data" and its contents are backed up to the destination folder "d:\my_backups".
The possible options for this setting are:Selected (default): Backups are created in the folder "d:\my_backups\c\data".
Not selected: Backups are created in the folder "d:\my_backups".
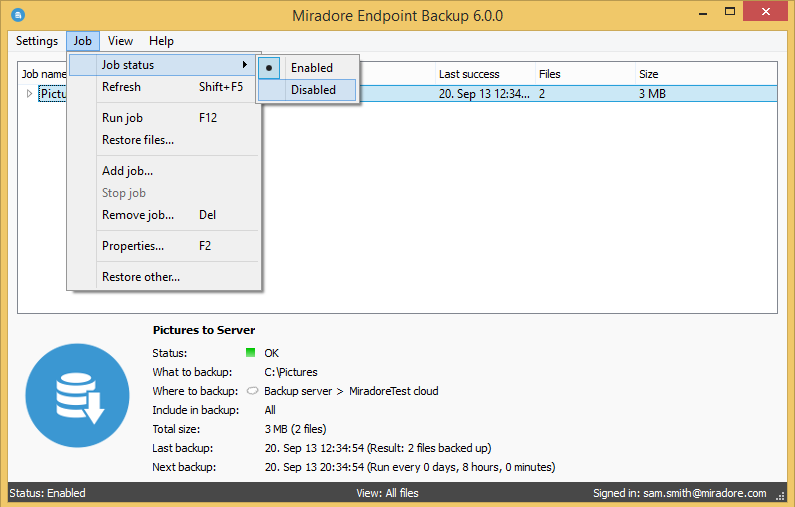
How to enable or disable backup jobs
Backup jobs can be enabled or disabled from the Job menu in the main window of Endpoint backup client.
How to restore files from backup
Below it is explained how Endpoint backup end-users can restore files from backup storage via the Endpoint backup client.
Notice:
Administrators can deny device end-users from restoring files from a backup using the "Allow restore for end-users" setting that is available at Endpoint backup job item page for such endpoint backup jobs whose type is "file system". Restore cannot be denied if the files are backed up to Endpoint backup server.
How to restore all files
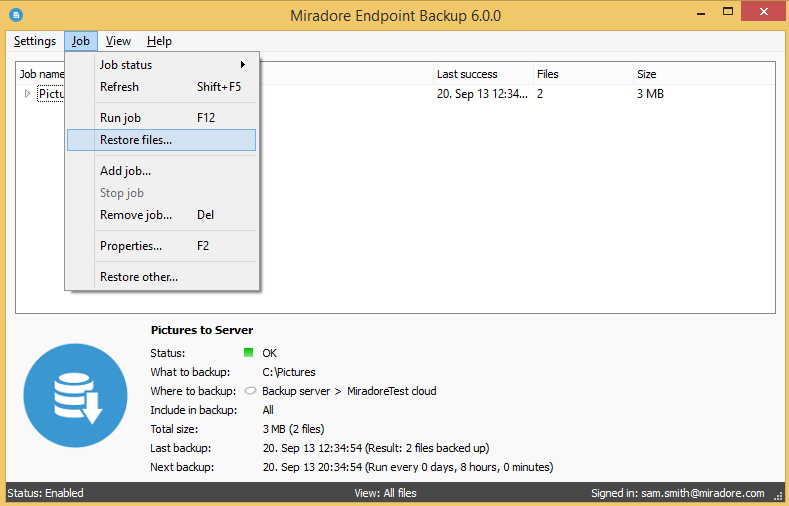
- On
the Endpoint backup client main window, right-click on the
backup job, which was used to backup the deleted or corrupted
file(s) and select "Restore files..." from the menu.
- On
"Restore files" window, click Start
if you wish to restore the files to their original location.
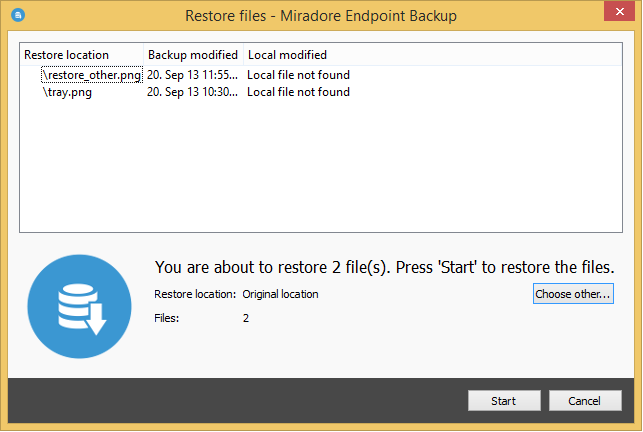
If you wish to restore the files to some other location, click Choose other and select the desired location and then click Start to start the restore.
How
to restore selected files (partial restore)
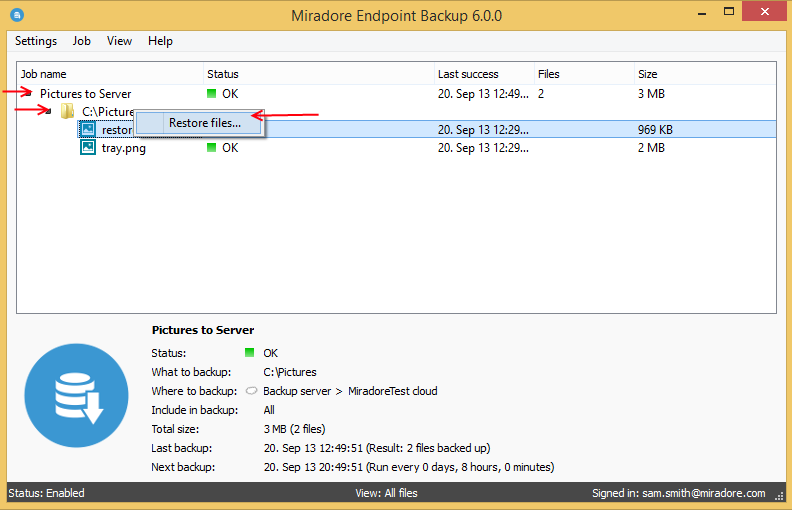
On the main window of the Endpoint backup client, look for the backup job which was used to backup the deleted or corrupted file(s) and click on the black triangle icon in front of the backup job to expand the backup contents.
When you see a list of backed up files, use Ctrl + left mouse button to select the files which you wish to restore and then select "Restore files" from the Job menu. The Restore files option also appears if you click right mouse button.
On the Restore files window, click OK if you wish to restore the files to their original location.
If you wish to restore the files to some other location, click Browse and select the desired location and then click OK to start the restore.
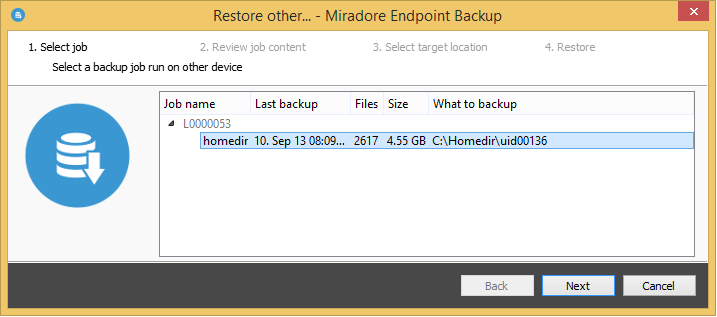
How to restore files from another device
With Restore other wizard, you are able to restore files from backup jobs that have been made on different devices than the one you are currently using.
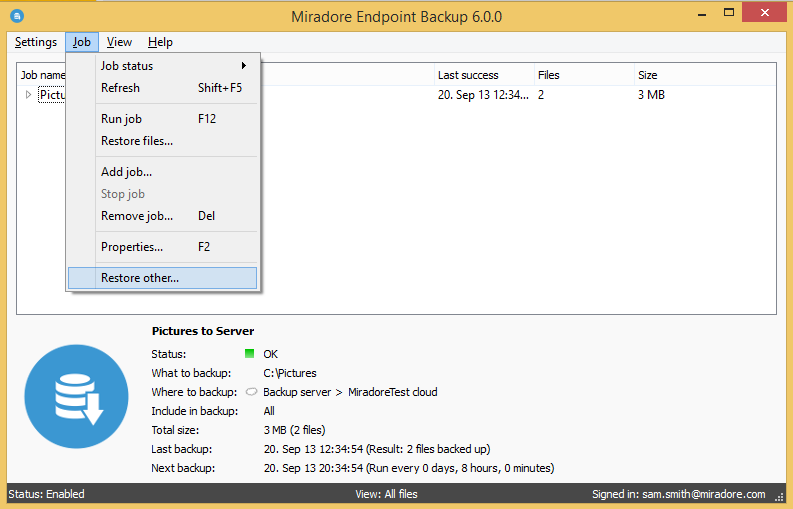
- On the
main window of the Endpoint backup client, start the Restore
other wizard by selecting "Restore other" from
the Jobs menu.
- You are
presented with a list of devices and backup jobs. Backups jobs
that have been made on the current device are not shown in the
list. Select the backup job which files you wish to restore and
click Next.
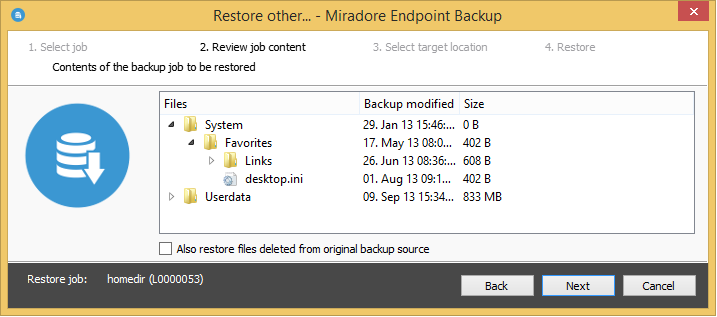
- List
of files to be restored is displayed. Please note that it is not
possible to restore individual files from backup jobs with the
Restore other wizard.
You may opt if you want to restore also files that have been deleted
from the backup source. Click Next to continue.
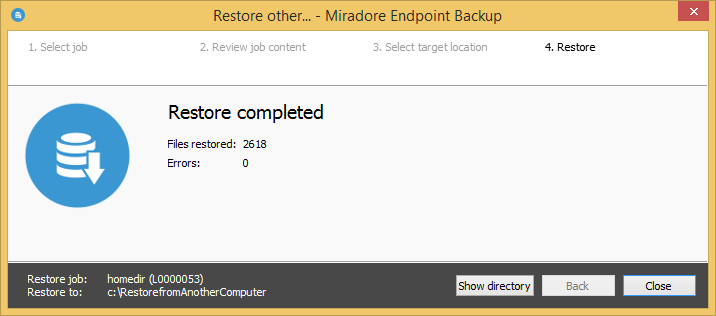
- Click
Browse to select target folder where the files are restored and
click Restore to start the restore.

- After
restore is complete, click Close to close the wizard.
Reporting in Endpoint backup
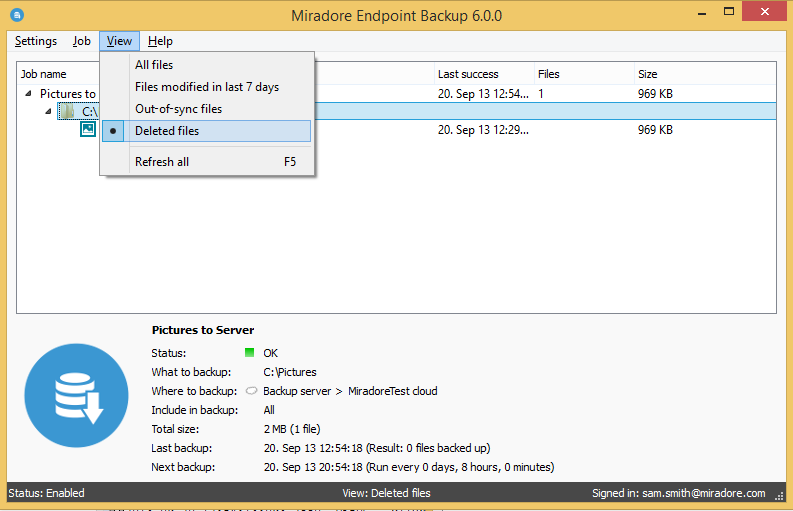
Endpoint backup end-users can see the current status of data backup jobs from main window of the Endpoint backup client. In the content area, the backup client shows the status of every backup job and file included into the backup job. The listed data can be filtered using the pre-configured views under the View menu (picture).
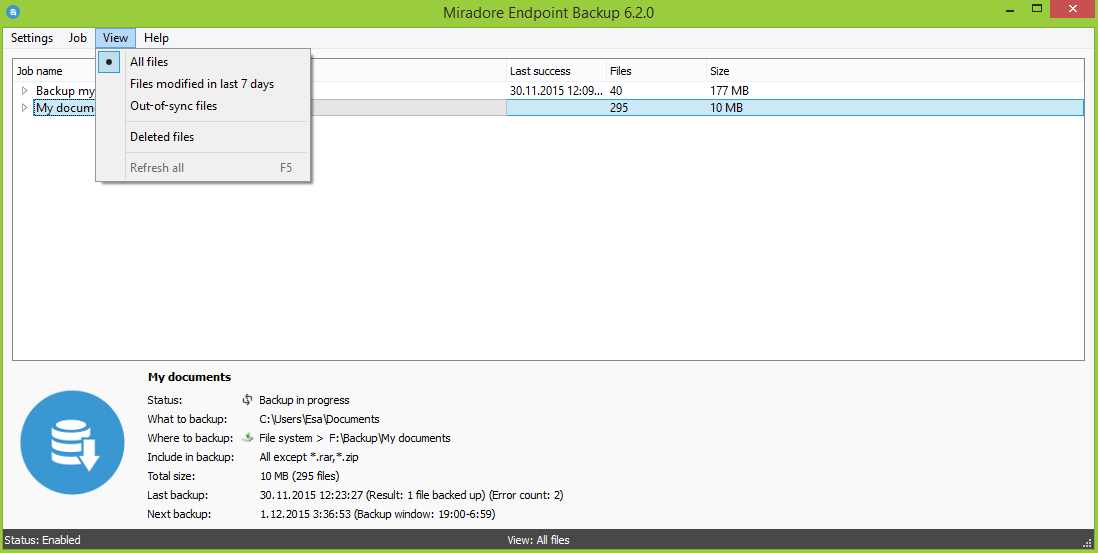
How to see and purge deleted files
Below is explained how to see a list of files which have been deleted, but which still have a backup file in the backup storage. After that it is described how deleted files can be removed permanently (purged) from the backup storage.
![]()
![]() Deleted files view in
Endpoint backup client shows a list of files which have been deleted
from backup source directory (What to backup folder), but which still
are stored in the backup storage.
Deleted files view in
Endpoint backup client shows a list of files which have been deleted
from backup source directory (What to backup folder), but which still
are stored in the backup storage.
![]()
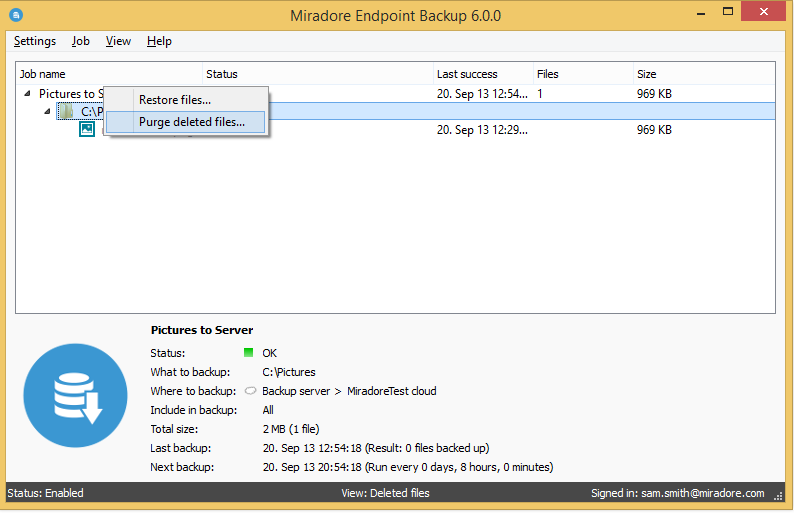
![]() Deleted files can be
removed permanently from the backup storage by using the "Purge
deleted files" menu item.
Deleted files can be
removed permanently from the backup storage by using the "Purge
deleted files" menu item.
![]()
![]() You will be asked to
confirm the purge when you are about to remove backup files permanently.
You will be asked to
confirm the purge when you are about to remove backup files permanently.
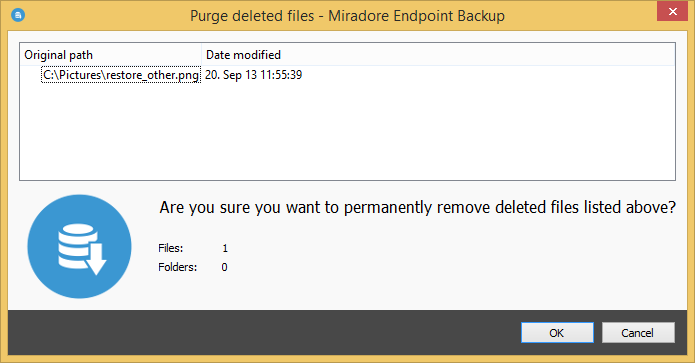
Notice that the backup client only allows to purge files if the backup files are stored on an Endpoint backup server. Purge cannot be used to permanently remove files which are backed up to file system.
How to remove backup jobs
Follow these steps to remove a backup job via Endpoint backup client.
Open the Endpoint backup client in a managed device
On the main window of Endpoint backup client, select the backup job which you wish to remove by clicking once on it.
Select "Job > Remove job..." from the menu.
Confirm the removal by clicking OK on the following popup.
Notice
You can also remove backup jobs by pressing right mouse button on a backup job and then selecting "Remove job..." from the menu.
As an alternative to permanent removal, you can disable a backup job from the menu.
Endpoint backup user cannot remove a mandatory backup job defined by an administrator.
Related to