If you need to open your Miradore Management Suite instance to the internet for clients to connect also when they are not in the internal network, it is more secure to do it with a reverse proxy than opening the Miradore server directly to the internet.
Reverse proxy can be a network device or a server that is opened to the internet and proxies the needed parts of the Management Suite instance to the internet.
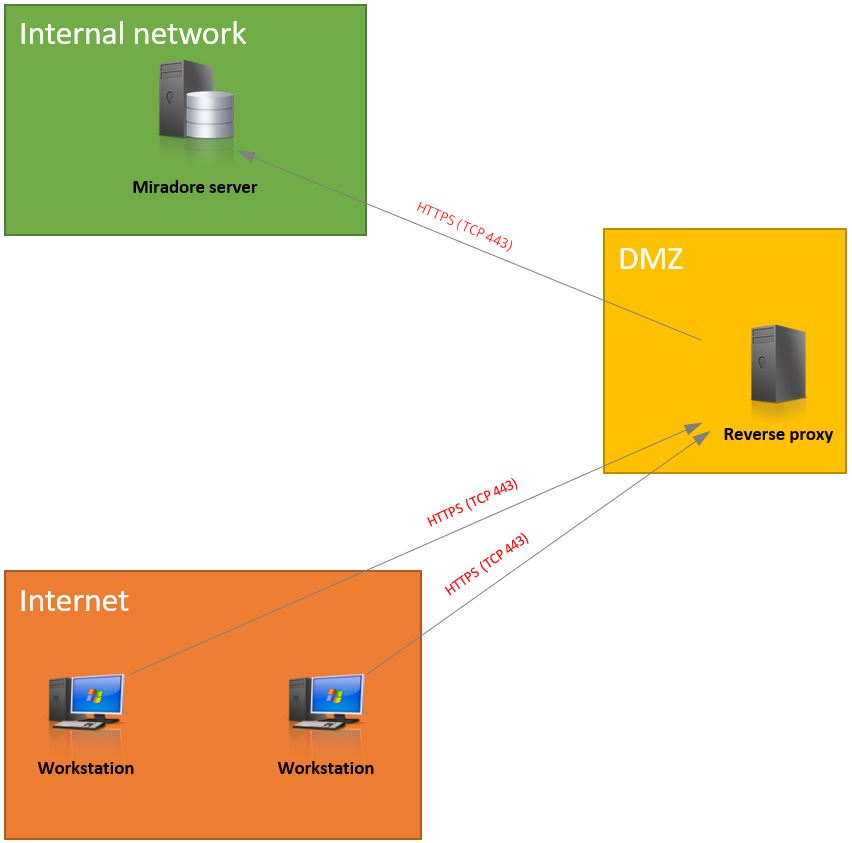
Here is an example network diagram how the reverse proxy can be used:
There are many different reverse proxy solutions available for different operating systems. One free option is to use nginx running on an Ubuntu virtual machine. In this example, Ubuntu Server has been installed with default settings. Below are the steps you need to take to enable nginx reverse proxy on the server.
1. Install nginx
sudo apt install nginx
2. Create a site configuration file for your reverse proxy address. Example command:
sudo nano /etc/nginx/sites-available/reverseproxy.trestacom.com.conf
3. There is an example configuration file below in this article where reverseproxy.trestacom.com is the public DNS name for the reverse proxy and mmssrv.trestacom.local is the Miradore Management Suite server’s DNS name in the internal network. IP address 1.1.1.1 is the public IP address of the reverse proxy. Here is a list of different URLs you need to have in the configuration for different features.
|
Feature |
URL for proxy_pass (Miradore is the instance name) |
|
Basic client communications (mandatory!) |
|
|
HTTP installation point (for package and patch distributions) |
|
|
Self-Service Portal |
|
|
Endpoint Backup |
|
/etc/nginx/sites-available/reverseproxy.trestacom.com.conf
|
server { location /Miradore/Connectors/Client.ashx { location /Miradore/Connectors/WebSocketHandler.ashx { location /Miradore/Connectors/MDScheduler.ashx { location /miradore/connectors/mdscheduler.ashx { location /Miradore/Connectors/PutFile.ashx { location /miradore/connectors/putfile.ashx { location /Setup_Miradore/ { |
* Notice that WebSocketHandler.ashx needs additional configuration to keep the client connections alive for client wakeups from the server.
For more information, refer to nginx documentation.
4. Once you are ready with the configuration file, you can enable the configuration by linking the configuration to sites-enabled using below command.
sudo ln -s /etc/nginx/sites-available/reverseproxy.trestacom.com.conf /etc/nginx/sites-enabled/
5. You can test that your configuration file is in the correct format by running command:
sudo nginx -t
6. Finally, to take your configuration into use, run this command to make nginx restart with new configuration.
sudo nginx -s reload
7. You should have a valid TLS certificate on your server. If you want to use free Let’s encrypt certificate, you can do the configuration first for http (80). Then install and run certbot to create the certificate for your reverse proxy public DNS address. Certbot will create needed changes to your configuration file (as in the example).
To make the clients communicate also through the reverse proxy DNS name, you need an additional client connection configuration.
1. Login to Miradore Management Suite instance and navigate to Administration > System settings > Clients. Then click Edit and in the Server network configurations box click Add profile…
2. Create a profile like in the below screenshot. Notice that if you set “Ignore SSL errors” as “No”, you must have a valid certificate on the reverse proxy server.
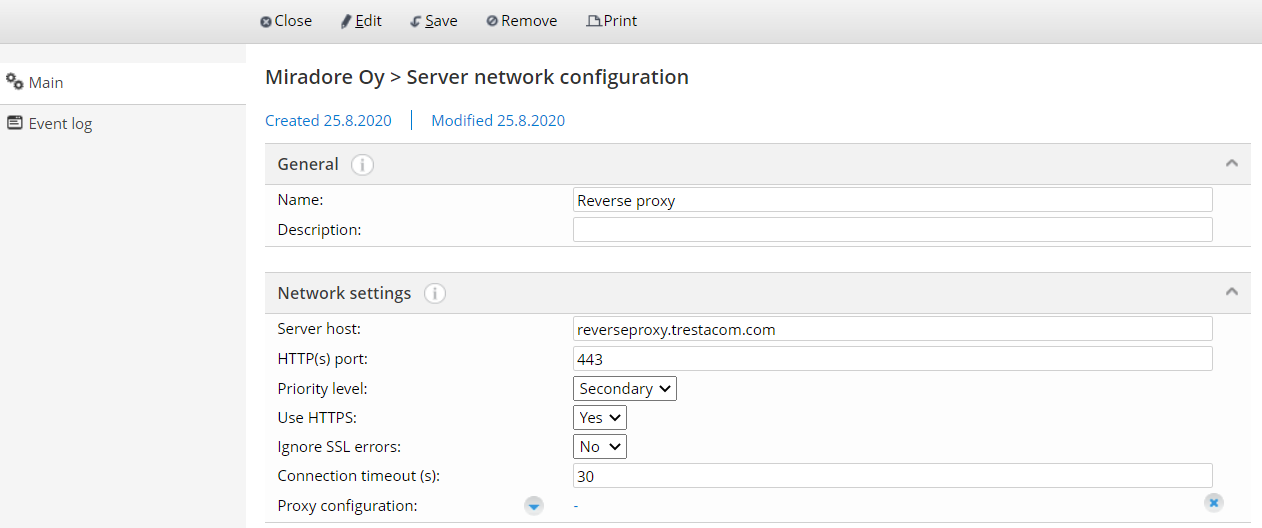
3. Save the settings. After that once your clients connect the server in the internal network next time, they will have the information about secondary configuration they can use while not being able to connect using the primary configuration (internal network DNS name).
1. Navigate to Administration > Feature settings > Installation points and click Tasks > Create to create a new installation point. Note: if you already have a default HTTP installation point, change it first as Default installation point: No,
2. Create the installation point configuration like in the below screenshot. Check that the read authentication user account is valid and has needed access to the files in the installation point.
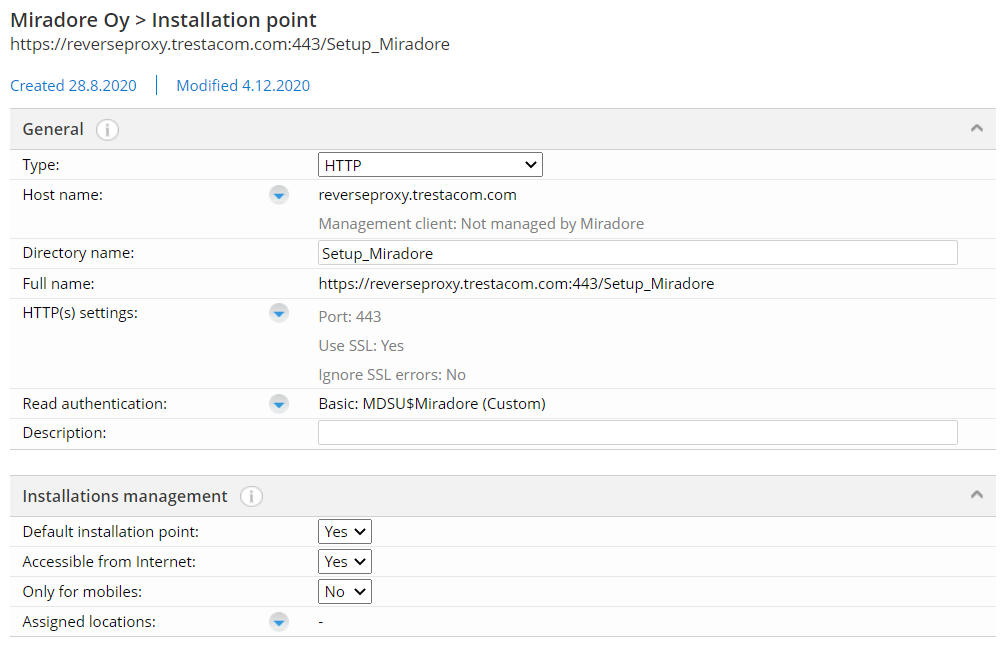
3. Save the newly created installation point.