How to check Windows 11 hardware readiness using custom inventory
Microsoft Windows 11 was officially released on October 4th, 2021. Now, many organizations are in the process of planning for the upgrade and assessing which devices in their organization meet the minimum system requirements for Windows 11.
Microsoft has published a Hardware Readiness PowerShell script that is an interim solution for determining if your devices meet the Windows 11 minimum system requirements. You can download the script here.
In this article, we explain how you can utilize Miradore's custom inventory feature to run that script on your devices. The scan results will be shown in Miradore.
How to configure Miradore to run the Hardware Readiness script
-
Go to "Administration > System settings > Main" and ensure that the "Custom inventory = Enabled" in the Miradore features table.
-
Go to "System settings > Main > Custom inventory and click "Edit".
-
Add a custom inventory class to the "Custom inventory data classification" table with the following name and display name.
Class name
Display name
Win11HWReadiness
Windows 11 Hardware Readiness
-
Add the following attributes to the "Custom inventory attributes" table:
Attribute name
Display name
Datatype
ReturnReason
Reason (for non-readiness)
String
ReturnResult
Result
String
-
-
Save the above made changes and go to "System settings > Clients" and click "Edit".
-
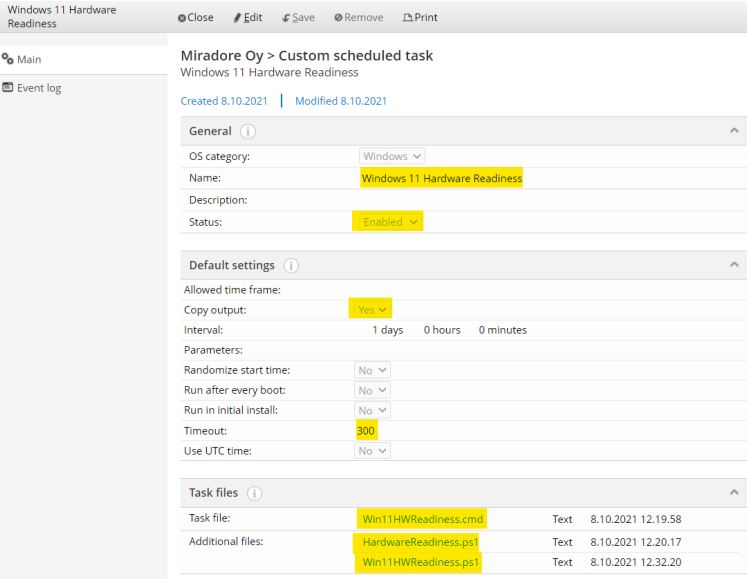
Add a new task into the "Custom scheduled tasks" table. Configure the task according to the following picture. You can find the task files from the zip file that is provided in the beginning of this article. Then Save and Close.
-
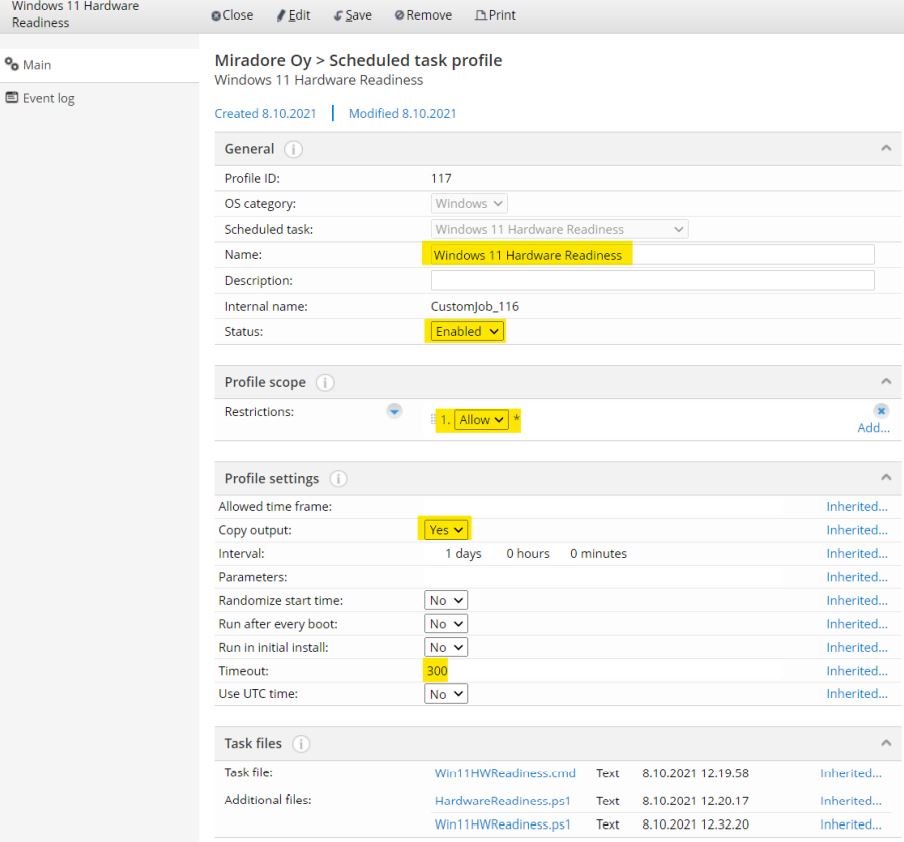
Add a new profile to the "Custom scheduled tasks" table. Use the following screenshot as an example. Select the profile scope based on your needs. The below example would run the inventory for all devices in your instance, but you might want to test the deployment first with a more limited number of devices. You can, for example, scope the deployment to be allowed only for assets whose device role is Workstation. You don't need to configure the profile settings in here, because they will be inherited from the task.
-
Save and Close the Scheduled task profile. Now you are all done with the setup and configuration phase.
Miradore Clients will start to run the inventory script at the devices within the next 24 hours. If you want, you can also speed up the process by using the "Tasks > Miradore client > Run scheduled task(s) now" task that is available at the Asset page.
How to see the results of the Windows 11 hardware readiness scan
You can see the scan results for all devices on the "Operations > Asset management > Inventory reports > Custom inventory view".
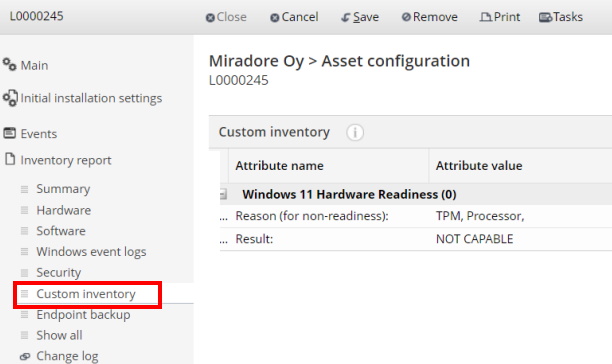
For a single device, you can see the scan results from the "Inventory report > Custom inventory" tab of the Asset page.
Relates to