Azure Active Directory integration
This article explains how you can use this integration script to import users from Azure Active Directory to Miradore Management Suite (MMS).
What the script does?
The provided script retrieves users that are members of a certain Azure AD group and creates them to MMS.
Users are identified using the user's object ID as the unique identifier. The object ID is saved together with the Azure AD Tenant Name to the user's Employee ID field in MMS (e.g. trestacom.onmicrosoft.com,xxxxxxxx-xxxx-xxxx-xxxx-xxxxxxxxxxxx).
Any changes to the other user attributes (Email address, First name, Last name, Phone number, User ID) in Azure AD will be replicated to MMS by the script.
The script will retire a user in MMS if the user no more belongs to the AD group in Azure AD, or if the user has been removed.
Good to know
-
The script should be always executed using the same user account, because the entered API credentials will be stored in an encrypted form after the first run.
-
The script needs to have access and valid credentials to Microsoft Graph API and MMS web service API
-
Users should have names defined in Azure AD. Otherwise, the user cannot be imported by the script.
Configuration file (config.json)
You can configure the integration script by modifying the configuration file (config.json). See the default configurations and description of all configuration options from below.
Example configuration
See the below picture for default/example configurations.

Description of configuration options
LogOnly: If this is true, the script will not do any changes. It will only log and show on the screen what it would do if the setting was false. Normally this setting should be false.
DateFormat: Date format used in the logging.
LogFilePrefix: This is the name of the log file followed by a date.
LogFileNameDateFormat: This is the date format used in the log file name.
KeepLogFilesForDays: When the script runs, it will remove log files that are older than the value here. Default is 5, which means that log files older than five days will be removed.
MMSProtocol: Protocol of the MMS server connection. Recommended is https, but http can be used too, if necessary.
MMSHTTPPort: HTTP(S) port of the MMS server you wish to connect to.
MMSServerHostName: Full DNS name of the MMS server you wish to connect to.
MMSInstance: Name of the MMS instance that you wish to connect to.
MMSIgnoreSSLErrors: Set as true if your MMS server is not having a valid certificate (e.g. self-signed certificate in use). Otherwise, set as false.
MMSCredFileName: The script saves MMS web service API credentials (username and password) to this file when you run the script for the first time. After that the credentials will be read from the file. The file will be in the same folder as the script itself.
MMSAPIItemsPerQuery: How many users the script will get per query from the MMS when it compares the user data between MMS and AAD. Having a large number here might affect performance. Default is 100.
MMSLocationName: Name of the Location item in MMS that should be selected for the users created by the script. Default location name is "Default".
MMSOrganisationName: Name of the Organization item in MMS that should be selected for the users created by the script. Default organization name is "Default".
AADTenantName: This is the Azure AD tenant primary domain name.
AADGroupID: Object ID of the Azure AD group which contains the users that should be imported to MMS. See the screenshot below to find out the value in the Azure Portal's group Properties. The script supports only one AAD group. You can modify the script or configure another instance of the script if you wish to import users from multiple AAD groups.

MSGraphAPICredFileName: The script saves Microsoft Graph API credentials (App ID and App secret) to this file when you run the script for the first time. After that, these credentials are read from the file. The file will be stored in the same folder than the script itself. App Id and App secret are used to get the Microsoft Graph API authentication token.
DomainDNSvsW2KName: By default, the script tries to guess the Windows 2000 domain name of the domain by taking the first part of the domain DNS name (e.g. trestacom.com => TRESTACOM). In case the Windows 2000 domain name is something else (e.g. TRESTA), then you can type it in the configuration. You can also tell the Windows 2000 domain names for multiple domains. See the example below.
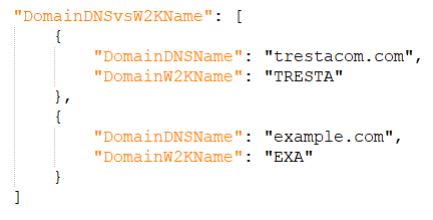
If you don't need this setting, you can either remove it from the configuration file or leave it to the default. It won't be used if your domain DNS names are not included.
Running the integration script for the first time
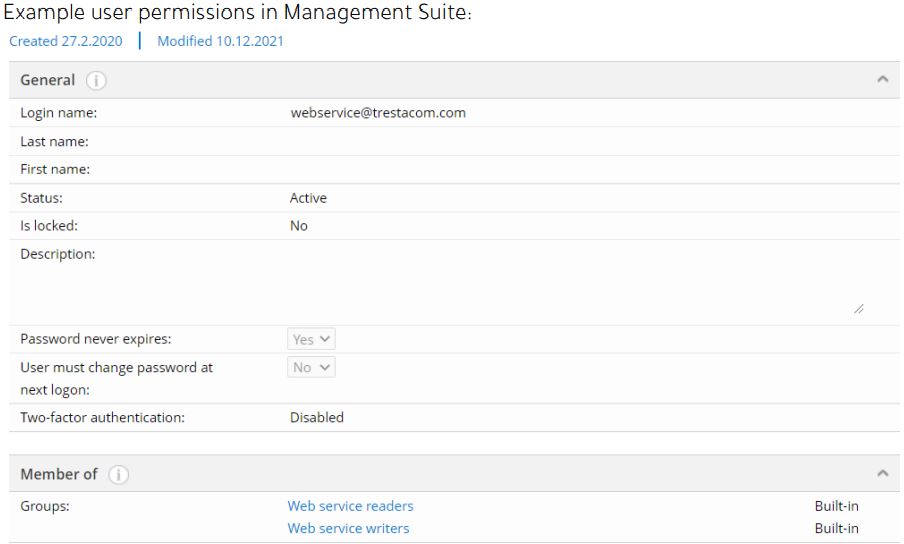
When you run the script for the first time, it will ask for Miradore Management Suite's web service API credentials. Please type in a username and password of an account that is member of Web service readers and Web service writers user groups in your MMS instance.
Miradore Management Suite API credentials
In the following screenshot, you see an example of a user account that belongs to the required user groups.
Microsoft Graph API credentials
After you have typed in the MMS API credentials, the script will ask credentials for the Microsoft Graph API.
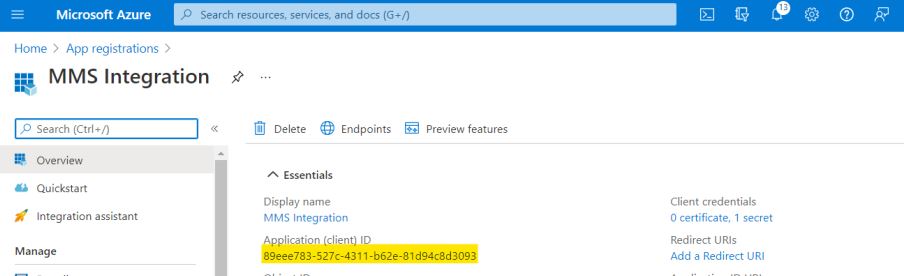
Type Application (client) ID as the username and Client secret as the password. You can create these in the Azure portal under App registrations. Just register a new application with default settings and you can see the Application (client) ID shown like below. Copy it to the script's credential prompt as the username.
Then go to Certificates & secrets in the Azure portal and click New client secret. Copy the value of the created secret to the password field of the script's credential prompt.
Notice that the client secret is only valid for a certain amount of time. Create a calendar reminder for yourself to create a new secret before the old one expires if you plan to automatize the running of this script.
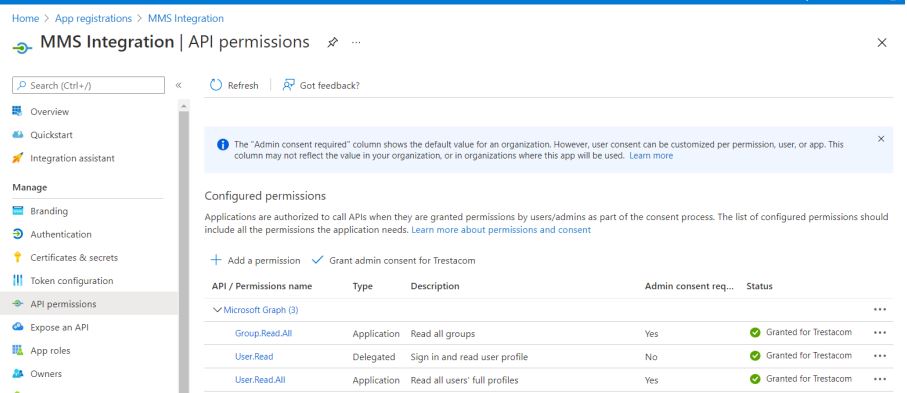
Before pressing OK in the credentials prompt, configure also the correct API permissions for the App registration in the Azure portal.
These permissions are needed to run the script: Group.Read.All, User.Read.All
Also remember to click the Grant admin consent for each permission. After that the page should look the same as in the following screenshot.
Once you have copied the needed information to the credential prompt and granted the access rights, press OK to start the script.
If you ran the script with the LogOnly = true configuration, check that everything looks OK and then change the LogOnly = false to allow the script to actually start importing the user data.
Automating the script with Task Scheduler
You can automate the running of the integration script using the Task Scheduler.
-
Before scheduling the script execution, make sure that you have copied the script to the server and ran it with the same user account that you are planning to use when scheduling the task. This is important, because the API credentials, used by the account, are saved into a file in an encrypted form and only the same user account is able to open the secrets in those files.
Note: Current version of the script uses Internet Explorer to parse the web request results. Therefore, before you run IE as a new Windows user, make sure to open up it once before you run the script. -
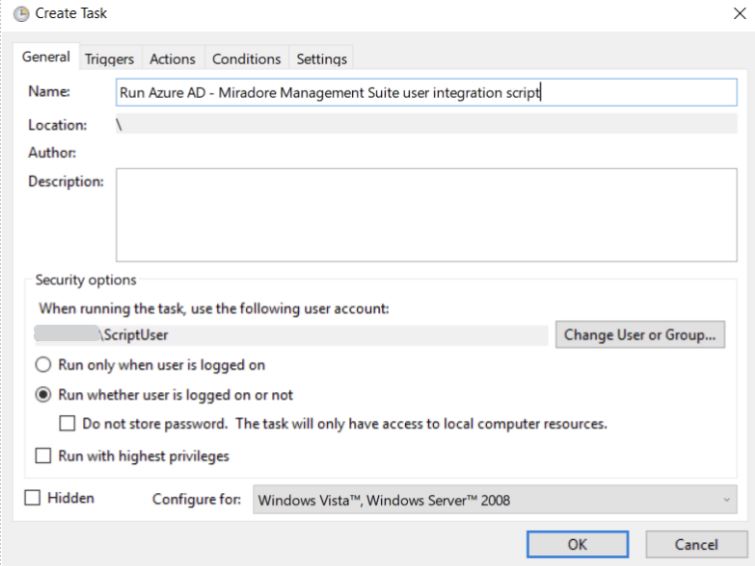
Open Task Scheduler and click Create task.
-
Give a name for the task and select the user account that will be running the script.
-
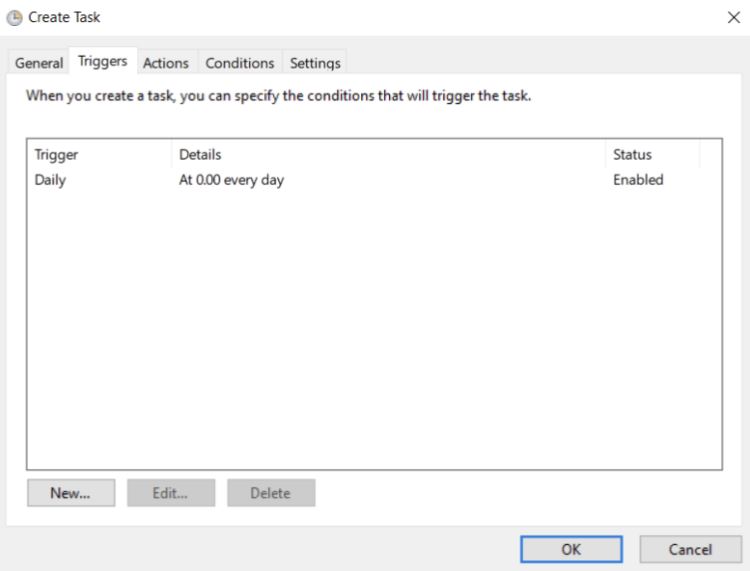
Select the desired schedule in the Triggers tab. For example: Daily at midnigth.
-
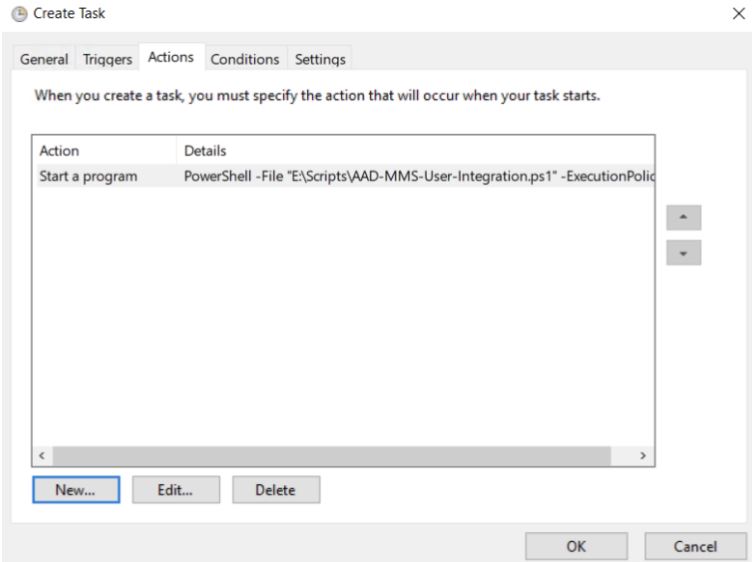
Create an action to start the script on the Actions tab.
-
Action: Start a program
-
Program/Script: PowerShell
-
Add arguments: -File "<PathToTheScript>\AAD-MMS-User-Integration.ps1" -ExecutionPolicy Bypass
-
-
You may leave the settings on the Conditions and Settings tab on defaults.
-
Click OK and save the task.
Relates to